The Redmineflux Testcase Management Plugin streamlines software testing process by providing a structured approach to test case creation, execution, and reporting. It allows users to define detailed test cases with steps, expected outcomes, and conditions, which can be organized into test suites for better management. The plugin not only facilitates test execution but also provides graphical reports that offer clear insights into test results, making it easier to track progress and identify issues. The reporting section includes various features such as activity summaries, defect reports, tester scorecard reports, and a requirement traceability matrix that links test cases with project requirements. Additionally, the plugin supports test runs, enabling teams to monitor their progress effectively and ensure comprehensive test coverage.
Fully compatible with CKEditor – Our plugins are designed to integrate with your specific CKEditor setup. Users are responsible for obtaining their own CKEditor license or plan.
Add Puppeteer as a dependency in your package.json file: “puppeteer”: “^22.8.2”
Install Node.js dependencies by running: npm install
Install the necessary browser for Puppeteer: npx puppeteer browsers install chrome
6. Start Sidekiq for Background Jobs Sidekiq is required to process background jobs for the plugin. Start Sidekiq using bundle exec sidekiq 7. Start Sidekiq for Background Jobs Rails s
Every Redmineflux license includes support for up to 100 active Redmine users by default. If your organization requires more than 100 active users, you’ll need to purchase additional user licenses.
You have two options to update your user license:
1. Purchase additional user licenses during your initial plugin purchase.
2. After the purchase, go to the “My Account” section in your profile to upgrade the number of users.
To configure the Redmine Plugin for Testcase Management, follow these steps:
Log in to your Redmine instance using administrative credentials.
Navigate to the Administrator tab from the top menu.
Click on Plugins, locate the Testcase Management Plugin, and click on the Configuration link.
In the configuration settings, select the appropriate trackers: Testcase Tracker – Defines test cases. Defect Tracker – Tracks defects linked to test cases. Feature Tracker – Manages feature requests. Optionally, enable the setting to show testcase count in test suites.
Important: Once test cases and defect records are created with the selected trackers, the configuration settings cannot be changed.
Click the Save button to apply the changes.
Additionally, you can set the Email Reminder Frequency, which determines how often overdue run notification emails are sent.
The plugin configuration also provides two additional tabs:
Run Email Template – Customize email templates for run-related notifications.
Testcase Email Template – Configure email templates for testcase-related notifications.
These settings help streamline communication and ensure efficient test management.
The Redmine Testcase Management Plugin enables administrators to define roles and assign specific permissions to manage user access effectively. Below is the list of available permissions, which can be configured in the Roles and Permissions section under Administrative Settings.
Test Suite Management
Create Test Suite – Allows users to create test suites.
Edit Test Suite – Allows users to edit test suites.
Delete Test Suite – Allows users to delete test suites.
Test Run Management
Create Run – Allows users to create test runs.
Edit Run – Allows users to edit test runs.
Delete Run – Allows users to delete test runs.
Close Run – Allows users to close test runs.
Test Execution
Execute Testcase – Allows users to execute test cases, add results, and create issues or defects linked to test cases.
Reporting
Create Report – Allows users to generate reports based on activities, test cases, and test runs.
Edit Report – Allows users to edit reports.
Delete Report – Allows users to delete reports.
View Report – Allows users to view reports.
To-Do Management
View All To-Do’s – Allows users to view all to-dos beyond their own.
Requirement Management
Add Requirement – Allows users to add requirements in the requirement section.
Edit Requirement – Allows users to edit requirements in the requirement section.
Delete Requirement – Allows users to delete requirements in the requirement section.
By assigning these permissions to different roles, you can ensure that users only have access to the functionalities they need to perform their jobs effectively.
How to Enable Email Notifications for Test Runs and Test Execution in the Testcase Management Plugin#
To enable email notifications for adding a run, updating a run, and test execution, follow these steps:
Log in with administrative credentials.
Navigate to the Administration section.
Click on the Settings tab.
Go to the Email Notifications tab.
Locate the section titled “Select actions for which email notifications should be sent.“
Check the boxes for: a.Run Added – Sends an email when a new test run is created. b. Run Updated – Sends an email when a test run is modified. c. Test Case Result Added – Sends an email when a test case result is recorded.
Click Save to apply the changes.
By following these steps, users will receive email notifications for test run additions, updates, and test case executions.
How to Enable and View the Testcase Plugin in a Project#
To enable the Testcase Management Plugin for a project, follow these steps:
Navigate to the Projects tab and select the project where you want to enable the plugin.
Click on the Settings tab in the project menu.
Go to the Modules section.
Check the box for Redmineflux Testcase Management to enable the module.
Click Save to apply the changes.
Once the plugin is enabled, you can access it by navigating to the Testcases tab in the project menu. This will allow you to view and manage test cases for that project.
To add a Test Case in the Testcase Management Plugin, follow these steps:
Navigate to the Test Cases tab from the sidebar
Click on the New Test Case button.
A form will appear—enter the required details, including Subject, Description, Assignee, Watchers, Category, Start Date, Due Date, and Priority.
Optionally, you can provide additional details such as Scenario and Estimation Time for better context.
To define the execution process, click on the New Step button. This will allow you to add individual test steps, where you can enter the Step Description and the Expected Result for each step.
Select a Requirement from the Requirement dropdown to link the test case to a specific requirement.
Once all required fields are filled, click the Create Test Case button to add the test case.
If you create a test case within a Test Suite, it will remain inside that specific Test Suite. The test case will not be available outside of the assigned test suite and will be accessible only within that suite’s structure. This ensures proper organization and maintains the hierarchy of test cases within the Testcase Management Plugin.
How to Import Test Cases in the Testcase Management Plugin#
To import test cases into the Testcase Management Plugin, follow these steps:
Navigate to the Test Cases tab from the sidebar.
Click on the Action MenuIcon and select the Import Test Cases option.
A form will appear—upload the CSV filecontaining test case data.
Fill in the import settings, including:
Field separator (e.g., comma, semicolon).
File encoding (e.g., UTF-8, ISO-8859-1).
Date format (e.g., DD/MM/YYYY, MM/DD/YYYY).
Choose the Test Suite where you want to import the test cases, then click Next.
In the Map Column and Row Layout section, match the columns from your CSV file with the corresponding Test Case fields, then click Next.
In the Map Values section, map CSV column data to Redmine issue statuses:
Example: If your CSV contains “Pending” status and Redmine uses “In Progress,” you can map them.
Similarly, map Priority and select the Remove HTML option for the subject field if necessary.
Click Next to proceed.
You will now see the Import Summary, which displays:
Test cases that can be created without warnings.
Test cases that can be created with warnings.
Test cases that cannot be created due to errors.
Click the Import button—only test cases without errors will be imported.
By following these steps, you can easily import test cases into the Redmineflux Testcase Management Plugin.
Go to the Test Case Detail Page of the test case you want to delete.
Locate the test case in the tabular list of test cases.
In the Action Menu, select Delete Test Case.
A confirmation prompt will appear—click Delete to confirm.
Once deleted, the test case will be removed from the Test Suite permanently.
By following these steps, you can efficiently create, edit, and manage test cases within the Testcase Management Plugin.
How to Add a Test Case to a Test Suite Using Drag and Drop#
To add a Test Case to a Test Suite using drag and drop, follow these steps:
Navigate to the Testcase Plugin within the specific project.
Go to the Test Cases tab from the sidebar.
Open the Test Suite sidebar by clicking the corresponding button.
Locate the Test Cases you want to add to a Test Suite.
Select multiple test cases by checking the checkboxes next to them.
Click and hold the test case with your mouse cursor, then begin dragging it towards the target Test Suite.
As you drag the test case, move it over the Test Suite sidebar, where the list of available test suites is displayed.
Carefully position the test case over the desired test suite.
Release the mouse button to drop the test case into the target test suite.
A popup will appear with three options:
Copy Here – Duplicates the test case into the test suite, maintaining the same data and records.
Move Here – Transfers the test case into the test suite, removing it from its original location.
Cancel – Aborts the action without making any changes.
Select the appropriate action to finalize the process
Once completed, the test case will now be part of the selected Test Suite. By following these steps, you can efficiently organize test cases using the drag-and-drop functionality.
To remove Test Cases from a Test Suite in the Testcase Management Plugin, follow these steps:
Navigate to the Testcase Plugin within the specific project.
Go to the Test Cases tab from the sidebar.
Click on the Test Suite from which you want to remove test cases.
Select multiple test cases by checking the checkboxes next to them.
Right-click on any selected checkbox to open the context menu.
In the context menu, click on Remove Test Cases.
If the Test Suite is associated with any Test Run, an error message will be displayed: “Test Suite is already added to a run. Cannot remove test cases.”
If the Test Suite is not linked to any Test Run, the selected test cases will be successfully removed.
By following these steps, you can easily remove test cases from a Test Suite in the Testcase Management Plugin.
How to Add a Requirement to Multiple Test Cases at Once#
To relate a Requirement to multiple Test Cases in the Testcase Management Plugin, follow these steps:
Navigate to the project where you want to link the requirement.
Go to the Testcases tab in the project menu to access the Testcase Plugin.
From the sidebar, navigate to Test Cases.
Select multiple test cases by checking the checkboxes next to them.
Right-click on any selected test case to open the context menu.
In the context menu, scroll to the bottom and find the Requirement option.
Click on the Requirement option and select the requirement you want to link.
Alternative Method: Using Bulk Edit
Select multiple test cases using checkboxes.
Click on the Bulk Edit option.
In the bulk edit form, locate the Requirement field.
Select the requirement you want to associate with the selected test cases.
Click Save to apply changes.
By following these steps, you can efficiently add a requirement to multiple test cases at once using either the context menu or the bulk edit feature.
To delete a Test Run in the Testcase Management Plugin, follow these steps:
Access the Testcase Plugin for the specific project.
Navigate to the Runs & Results tab from the sidebar. This section lists all test runs and their outcomes.
Locate the Test Run you want to delete and click on its Action Button. A toggle menu will appear with multiple options—select Delete Run to begin the deletion process.
A confirmation prompt will appear to prevent accidental deletions. Review the prompt to ensure you are deleting the correct test run.
Click the Delete button to confirm. This action will permanently remove the test run from the Testcase Management Plugin.
By following these steps, you can efficiently delete a Test Run from the Testcase Management Plugin.
To close a Test Run in the Testcase Management Plugin, follow these steps:
Access the Testcase Plugin for the specific project.
Navigate to the Runs & Results tab from the sidebar. This section lists all test runs and their outcomes.
Locate the Test Run you want to delete and click on its Action Button. A toggle menu will appear with multiple options—select Close Run to initiate the closing process.
A confirmation promptmay appear to ensure you want to close the run. Click the Close Run button to confirm.
Once the run is successfully closed, it will no longer appear in the active runs list. To view closed runs, navigate to the Closed tab within the Runs & Results page.
By following these steps, you can efficiently close a Test Run in the Testcase Management Plugin and track completed test executions.
To execute a Test Run in the Testcase Management Plugin, follow these steps:
Access the Testcase Plugin for your specific project by navigating to the Runs & Results tab from the sidebar.
Click on the Run Name you want to execute. This will display all test cases associated with the run.
Select the Environment in which you want to execute the test case. You can change the environment by selecting it from the options available near the run name.
To add a result for a specific test case, click on the Result field next to it.
A pop-up window will appear, prompting you to select the status of the test case. Available statuses include: a. Untested, Passed, Failed, Retest, Blocked, Skipped
If the test case status is set to Failed or Blocked, a Report Bug button will appear. Clicking on this button allows you to create a new defect directly linked to the failed test case and test run.
You can also relate an existing defect by searching for it in the search box and selecting the appropriate bug. Once selected, the bug will be linked to the test case within the specific run and environment.
Optionally, you can:
Attach files as evidence or for documentation purposes.
Add a note to provide additional details about the test execution.
Click the Save button to update the test case status. This action records the result and ensures proper tracking of all test executions.
Once saved, the system automatically updates a visual chart, reflecting the test outcomes with color-coded statuses. This provides clear and immediate feedback on the overall progress of the test run.
By following these steps, you can efficiently execute test cases within a Test Run in the Testcase Management Plugin, ensuring accurate tracking and reporting of test results.
How to Execute Test Cases from the Test Case Detail Page#
To execute a Test Case from the Test Case Detail Page in the Testcase Management Plugin, follow these steps:
Search for the Test Case and open its Detail Page.
Locate the Test Case Execution section.
Select the Run and its corresponding Environment in which you want to execute the test case.
Click on the Status Button next to the Result field.
Steps 5–9 are the same as executing from the test run:
Select the Run and Environment where you want to execute the test case.
Click on the Result field and choose the execution status.
If Failed or Blocked, use the Report Bug option or link an existing defect.
Attach files or add notes if needed.
Click Save to update the execution status.
By following these steps, you can efficiently execute test cases from a Test Case Detail Page in the Testcase Management Plugin.
How to Filter Test Cases Based on Defects in the Testcase Plugin#
To filter Test Cases in a Test Run based on whether they have defects or not, follow these steps:
Access the Testcase Plugin for your specific project by navigating to the Runs & Results tab from the sidebar.
Click on the Run Name you want to view. This will display all test cases associated with the run.
Click on the Filter Button, which will open a dropdown with multiple filtering options.
Look for the Defect Status filter and choose one of the following options:
With Defect – Displays only test cases that are linked to defects.
Without Defect – Displays only test cases that have no associated defects.
You can combine this filter with other options such as Priority, Run Result, Created At, or Updated At for more refined results.
Click the Apply Filters button to filter the test cases accordingly.
To reset the filters and view all test cases, click the Clear button in the filter popup.
By following these steps, you can easily filter test cases in a Test Run based on whether they are linked to defects or not in the Testcase Management Plugin.
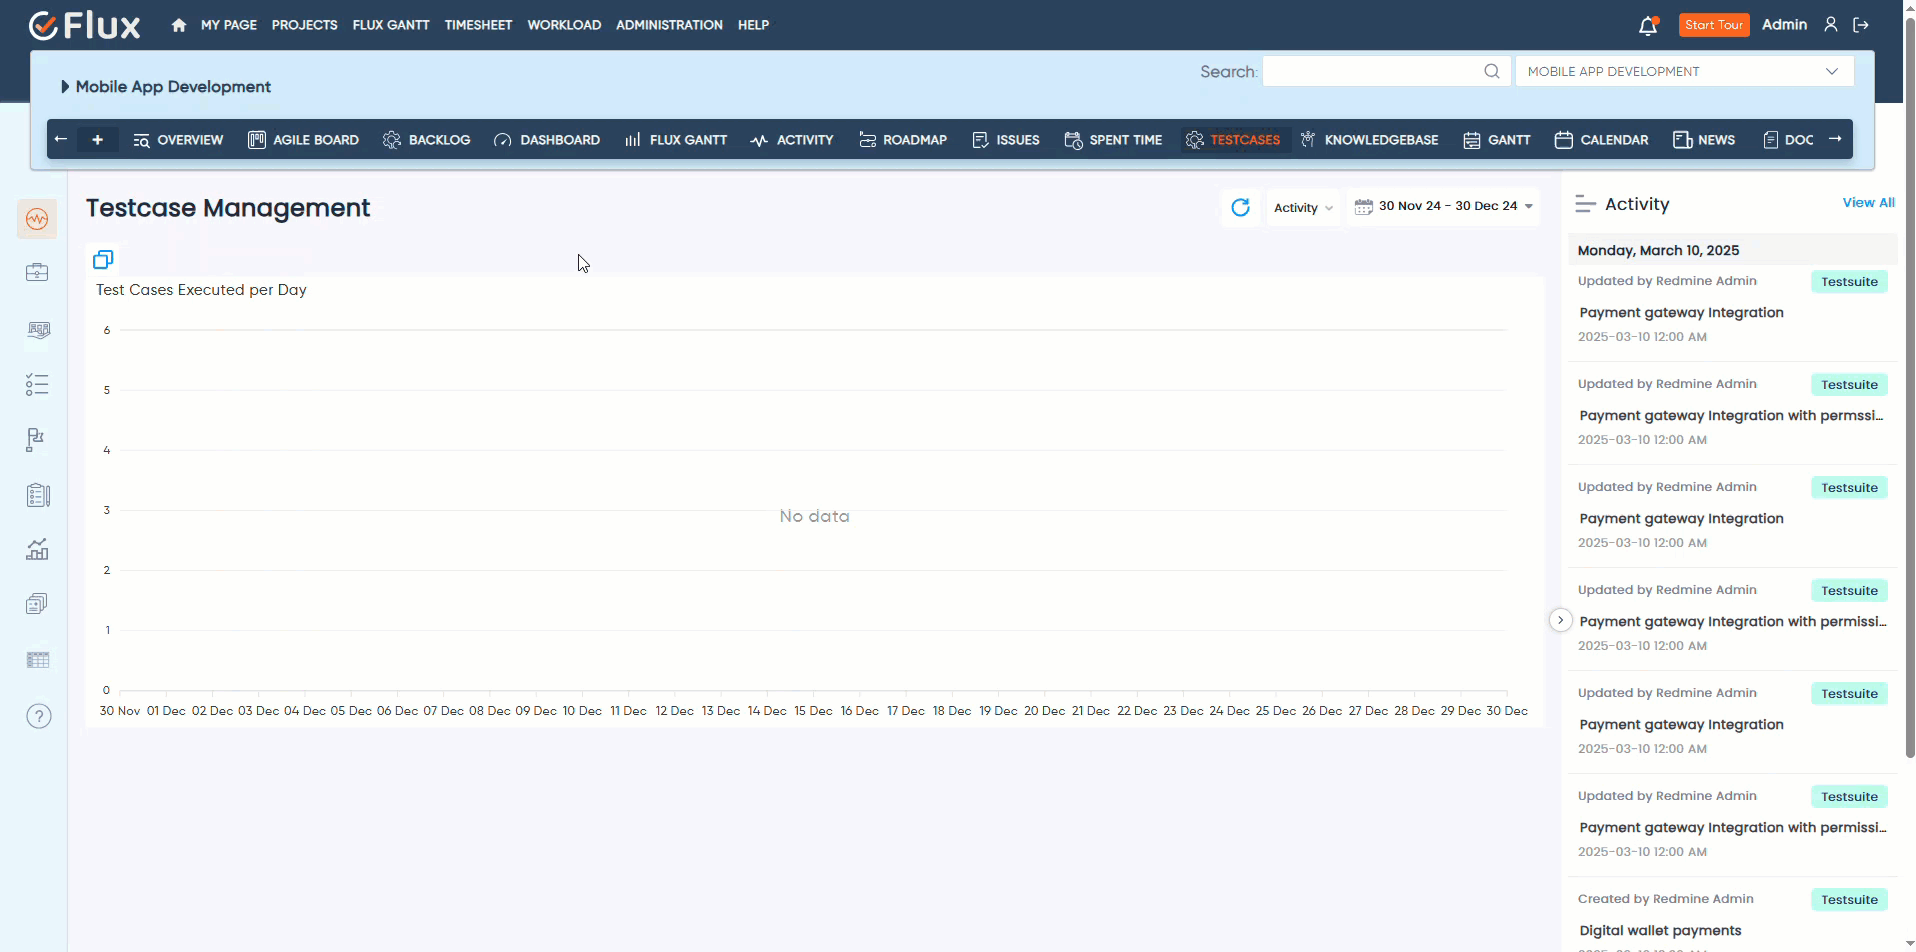
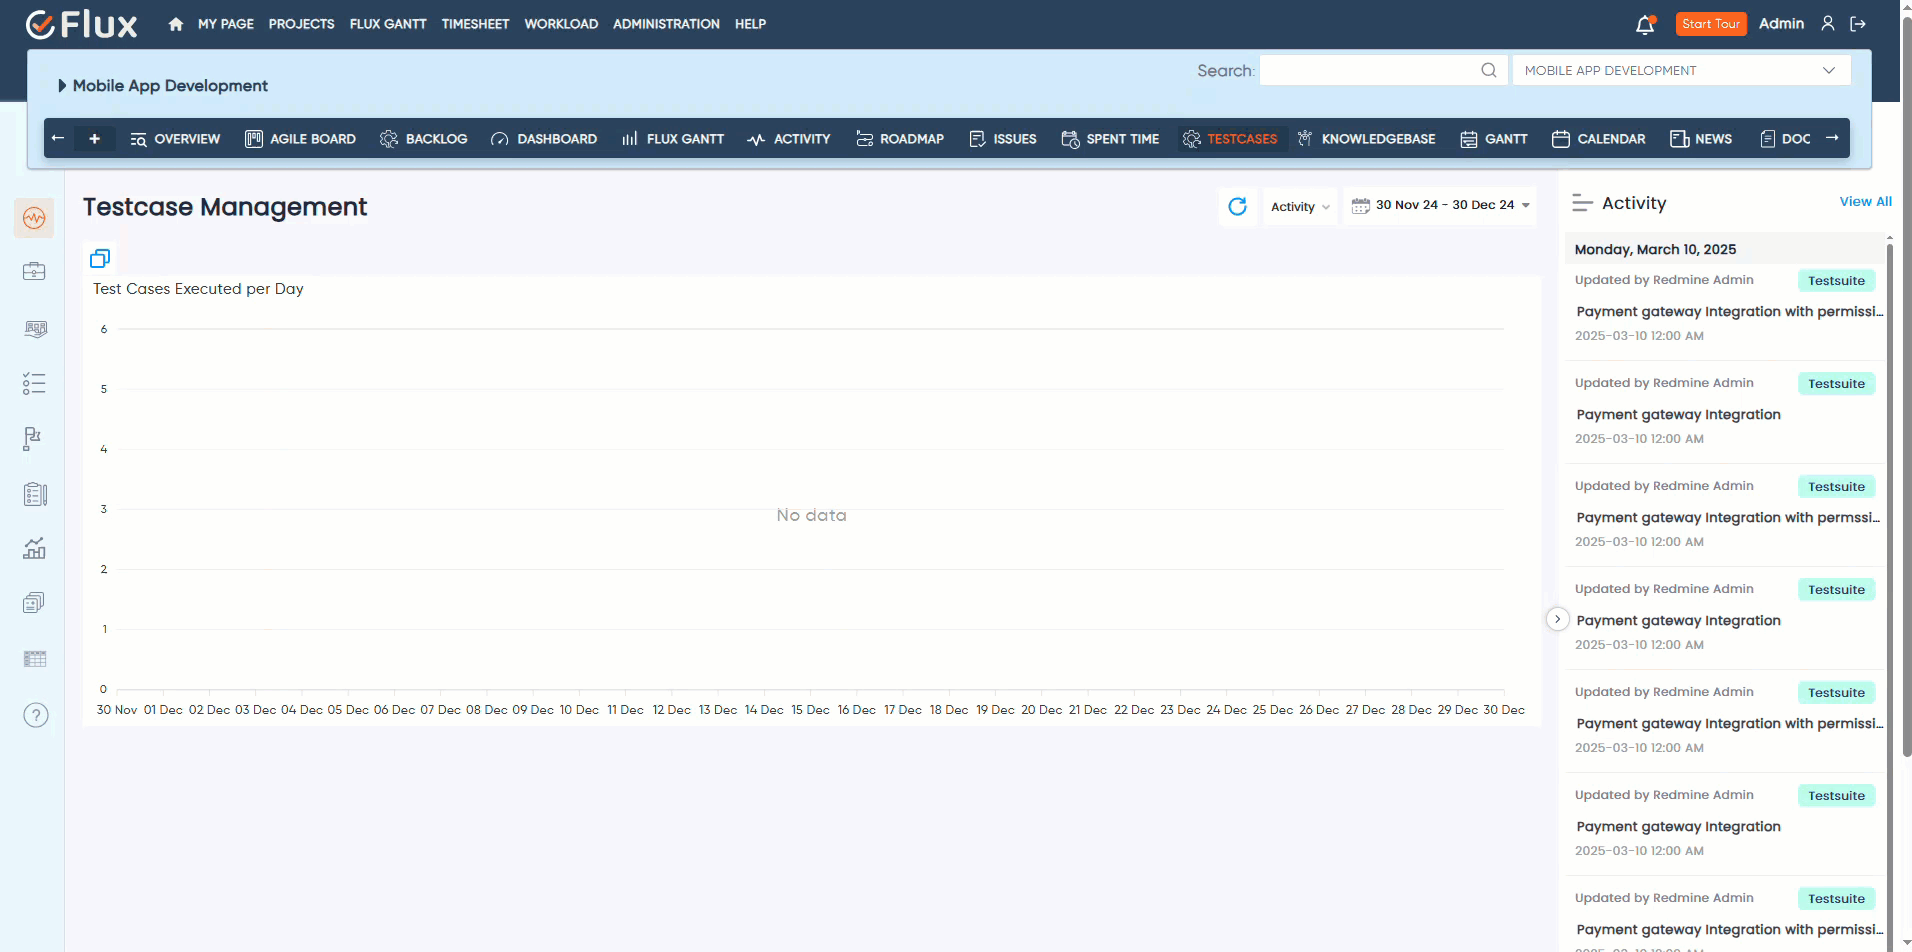
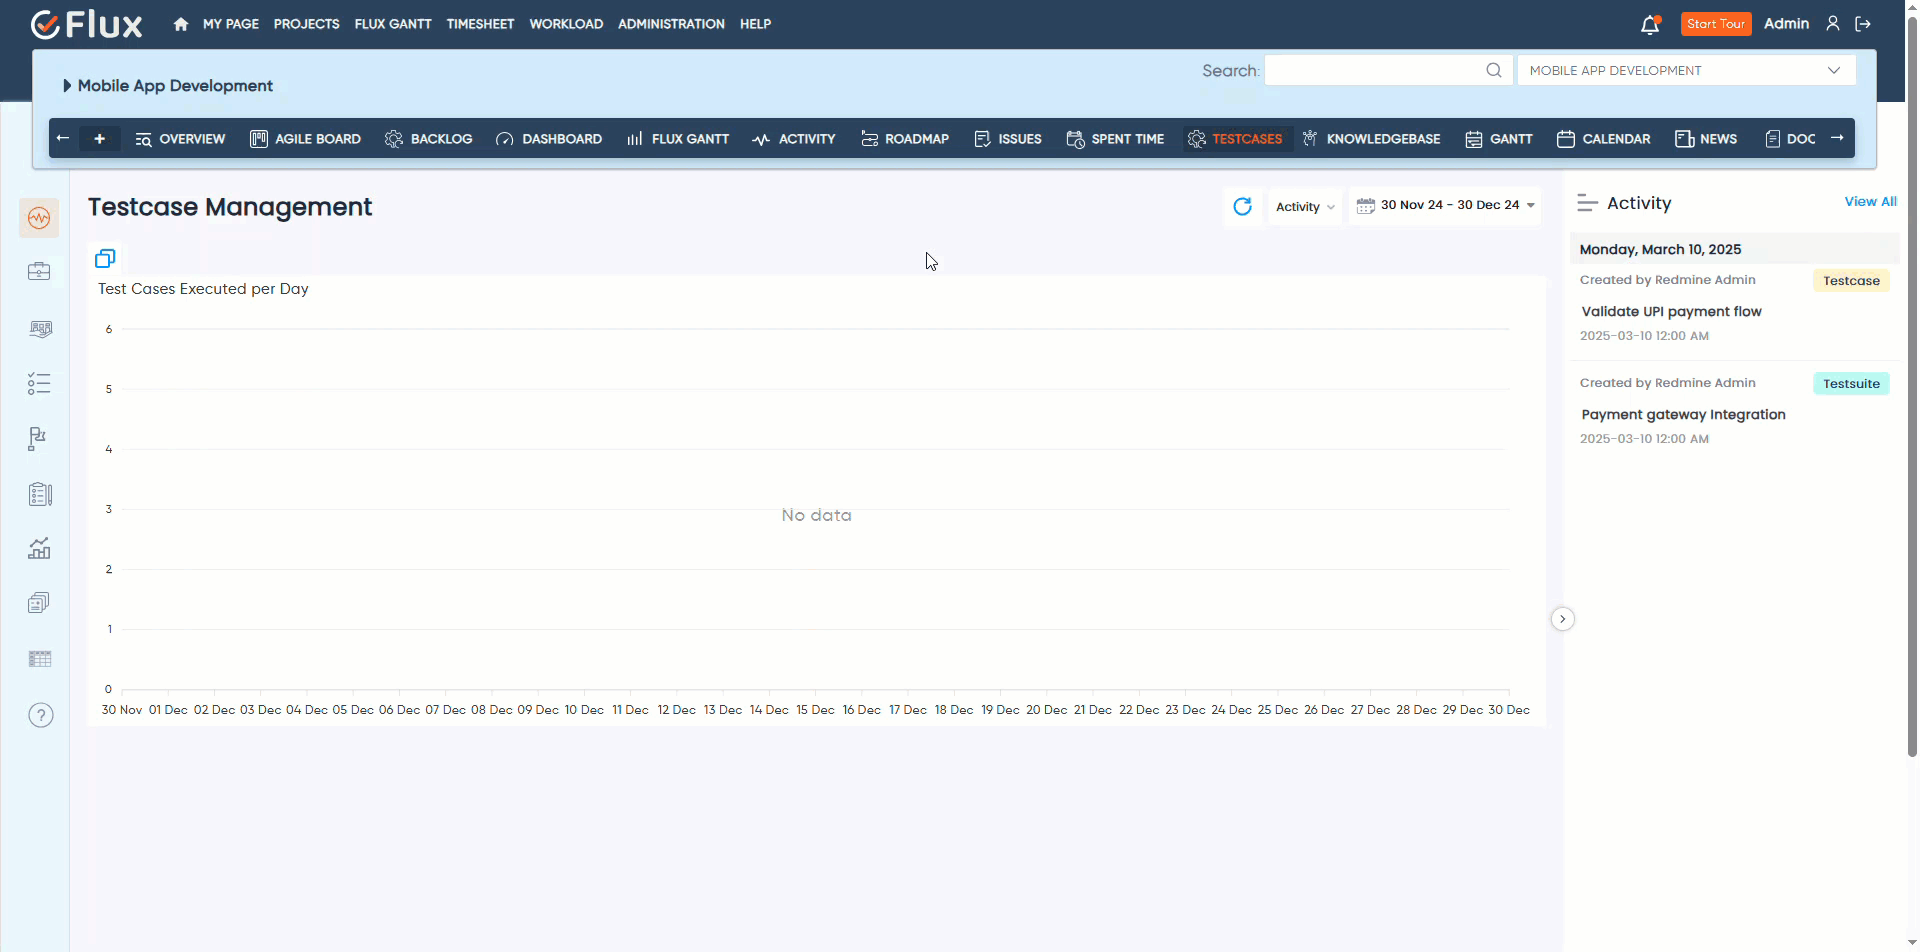
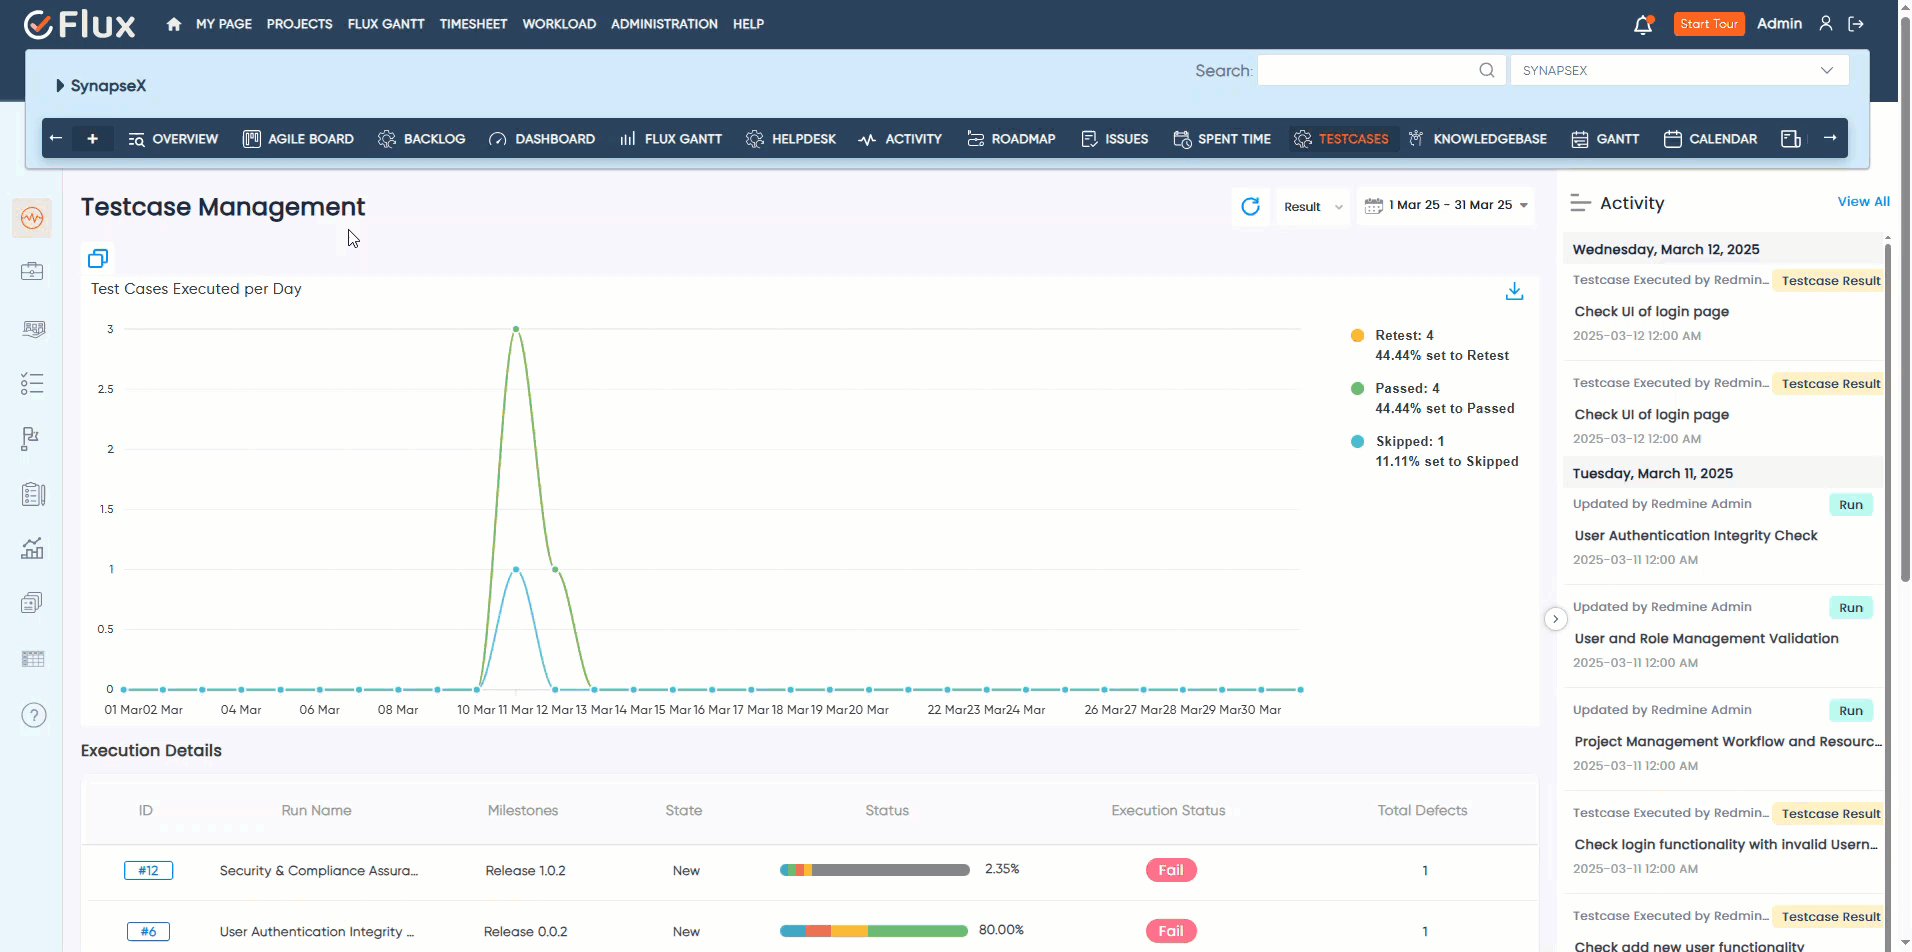
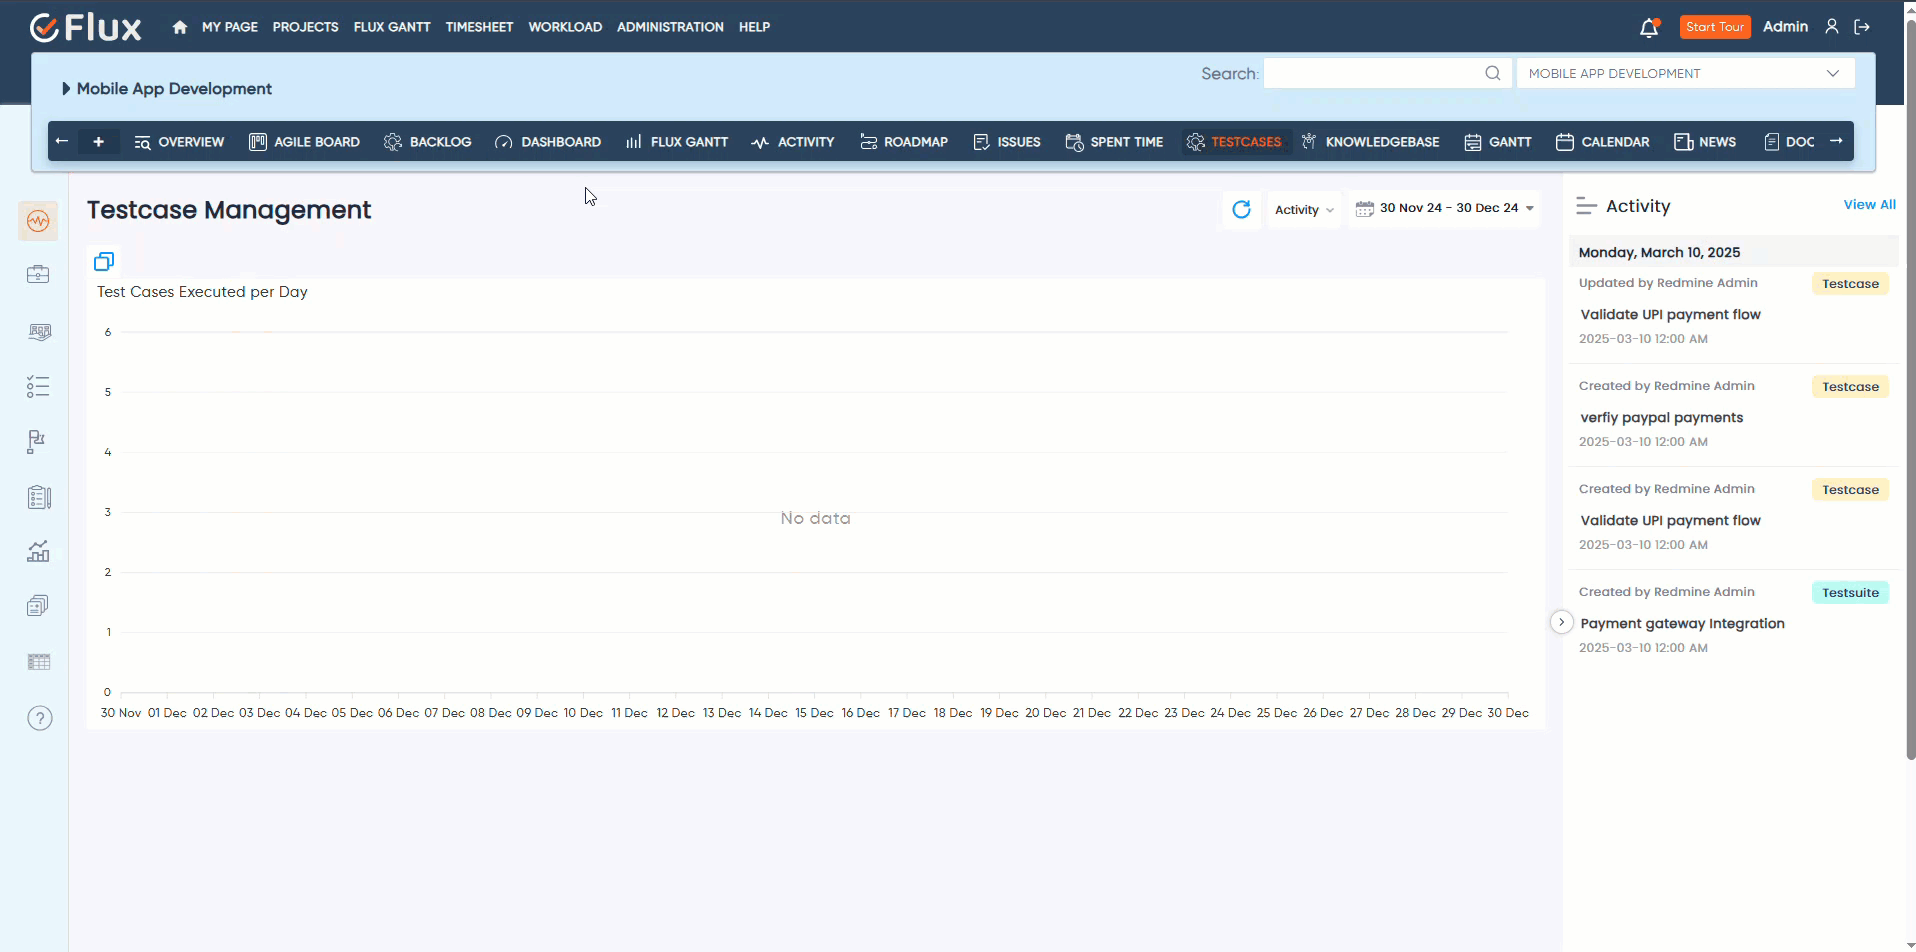
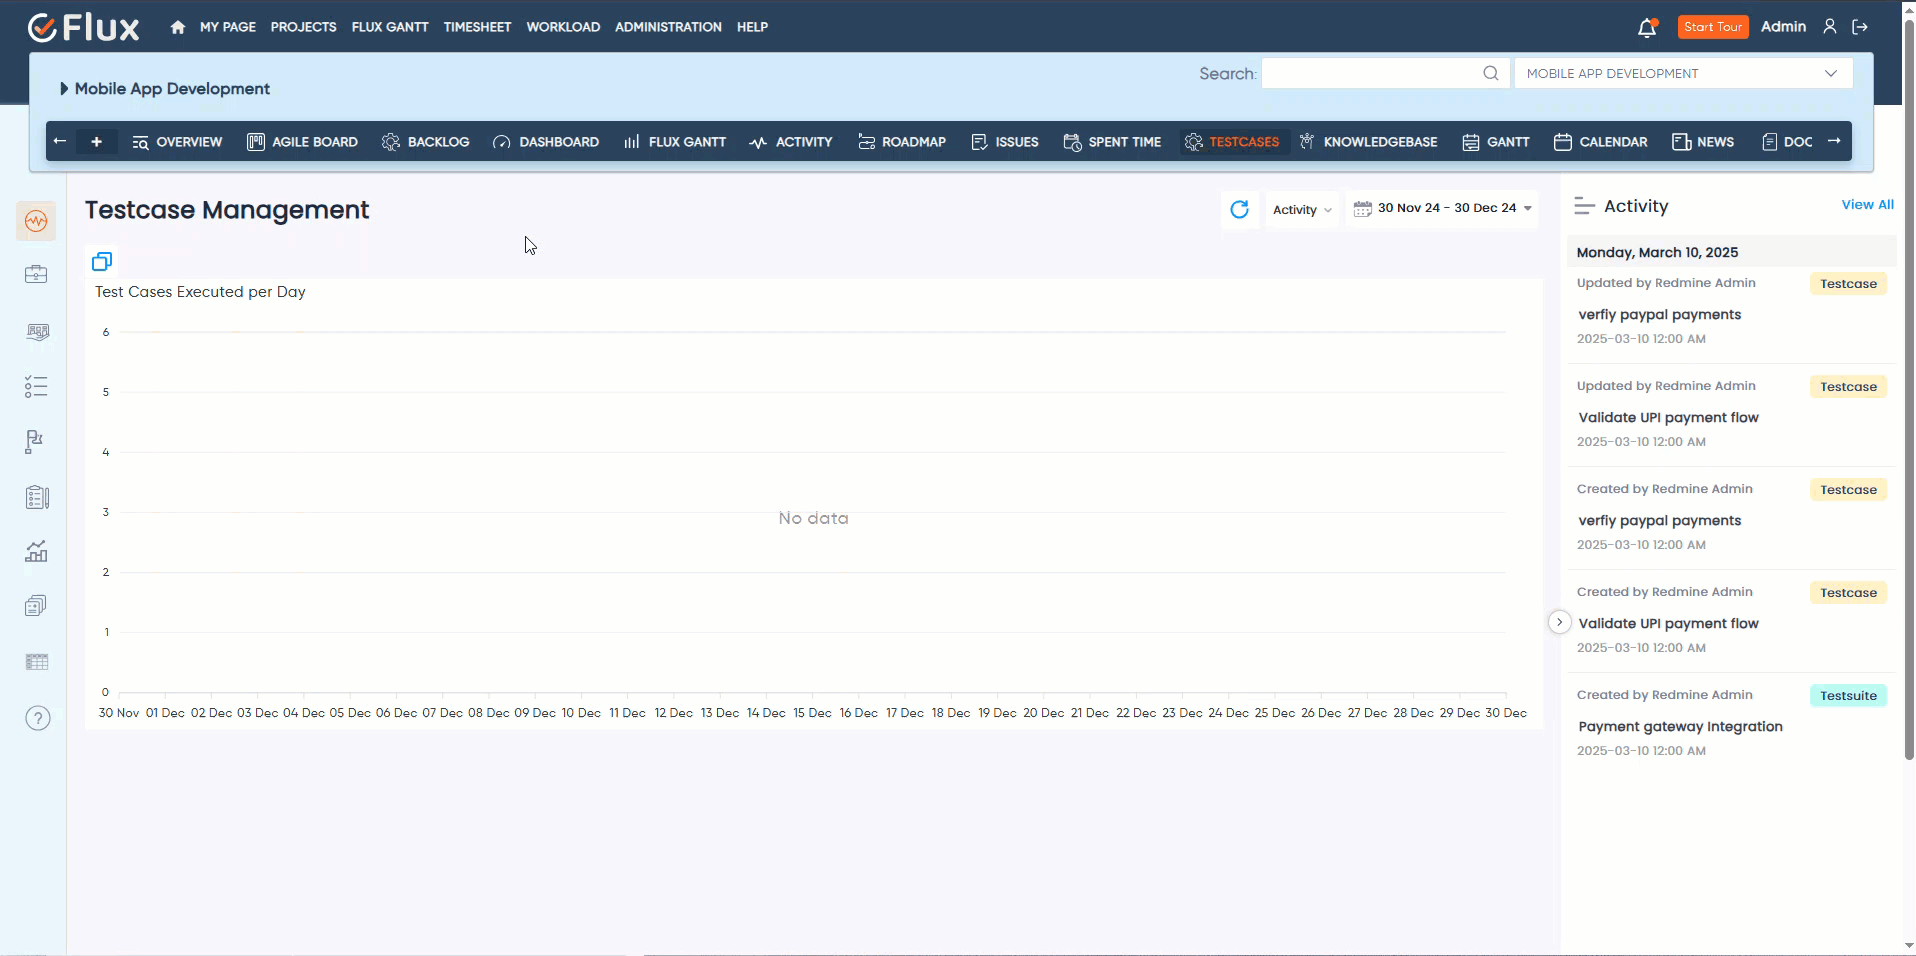
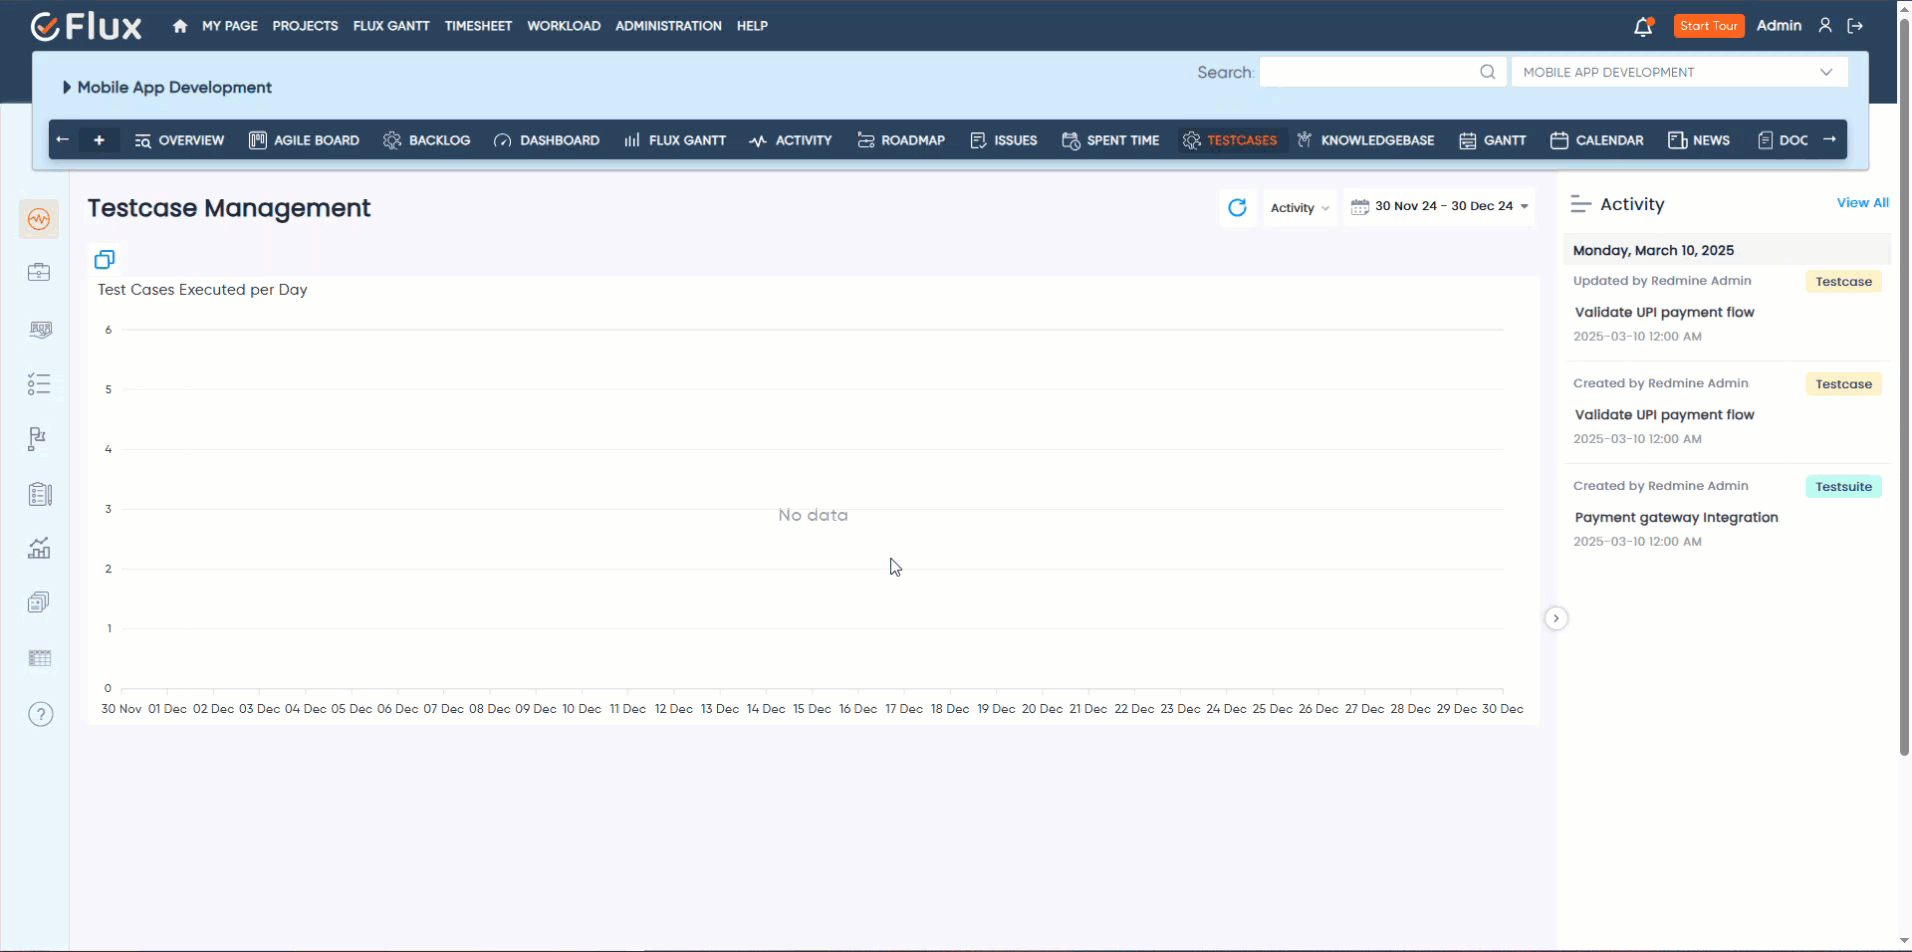
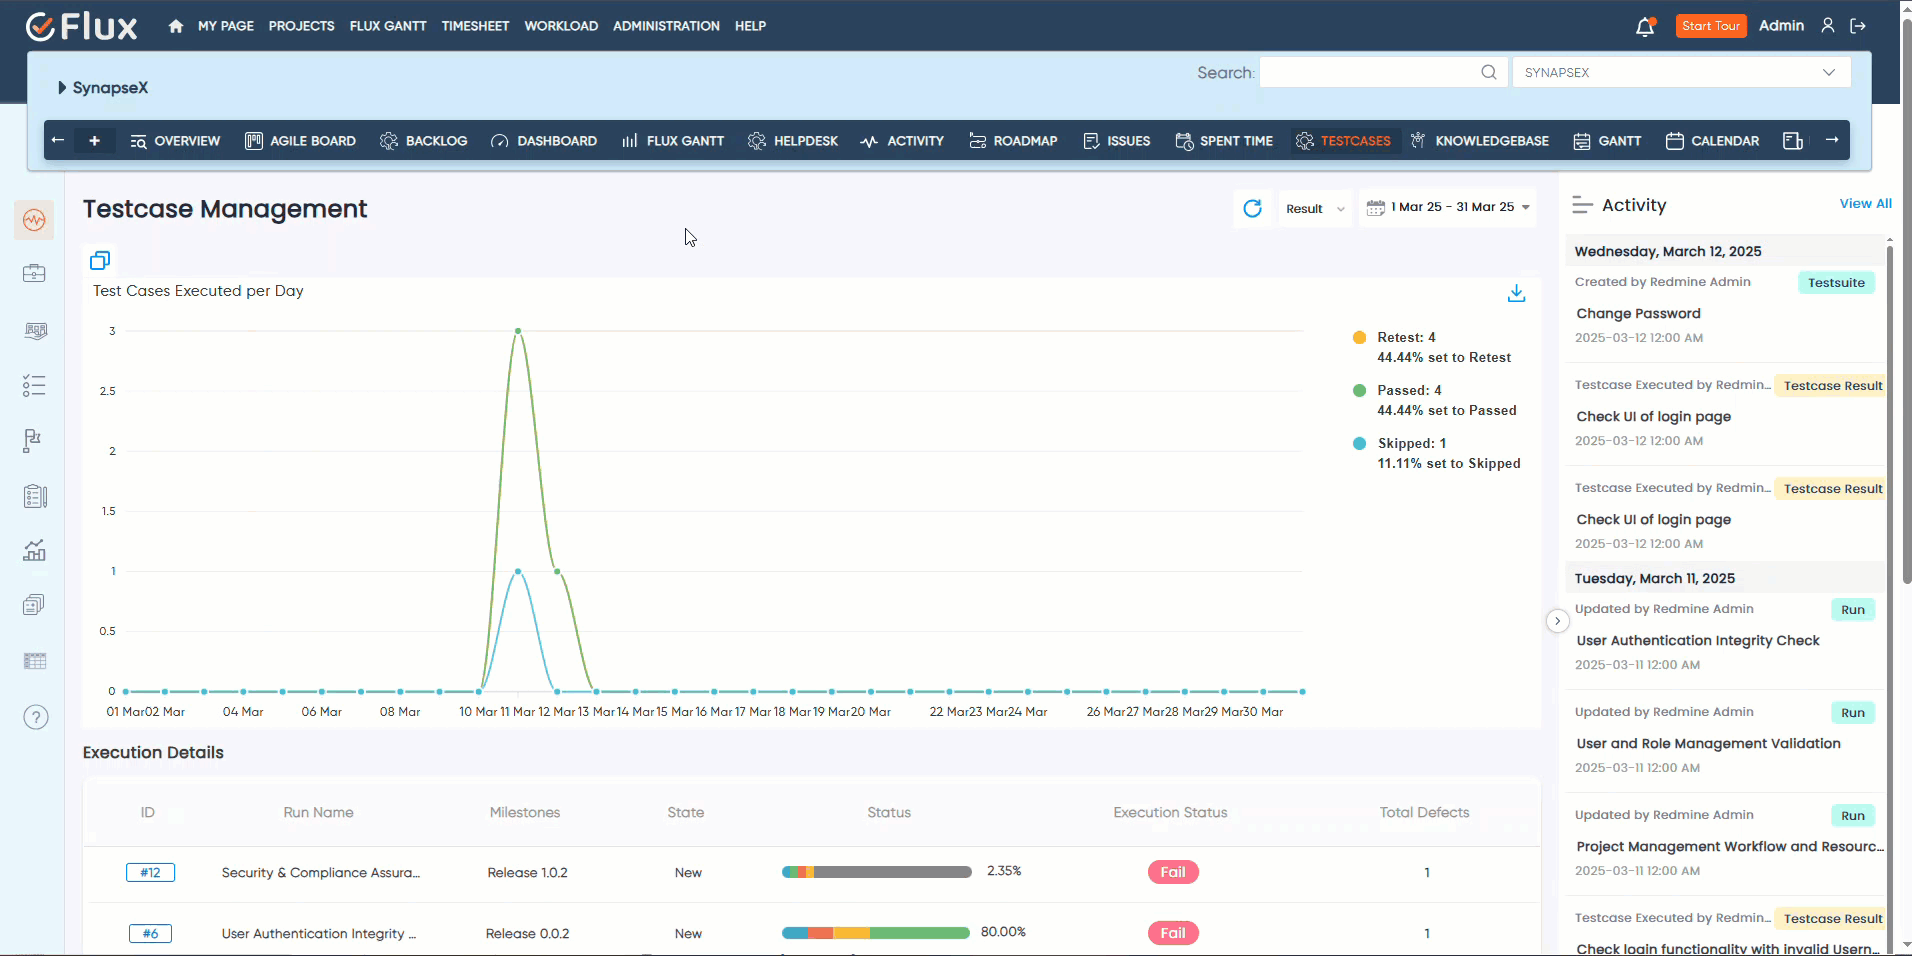
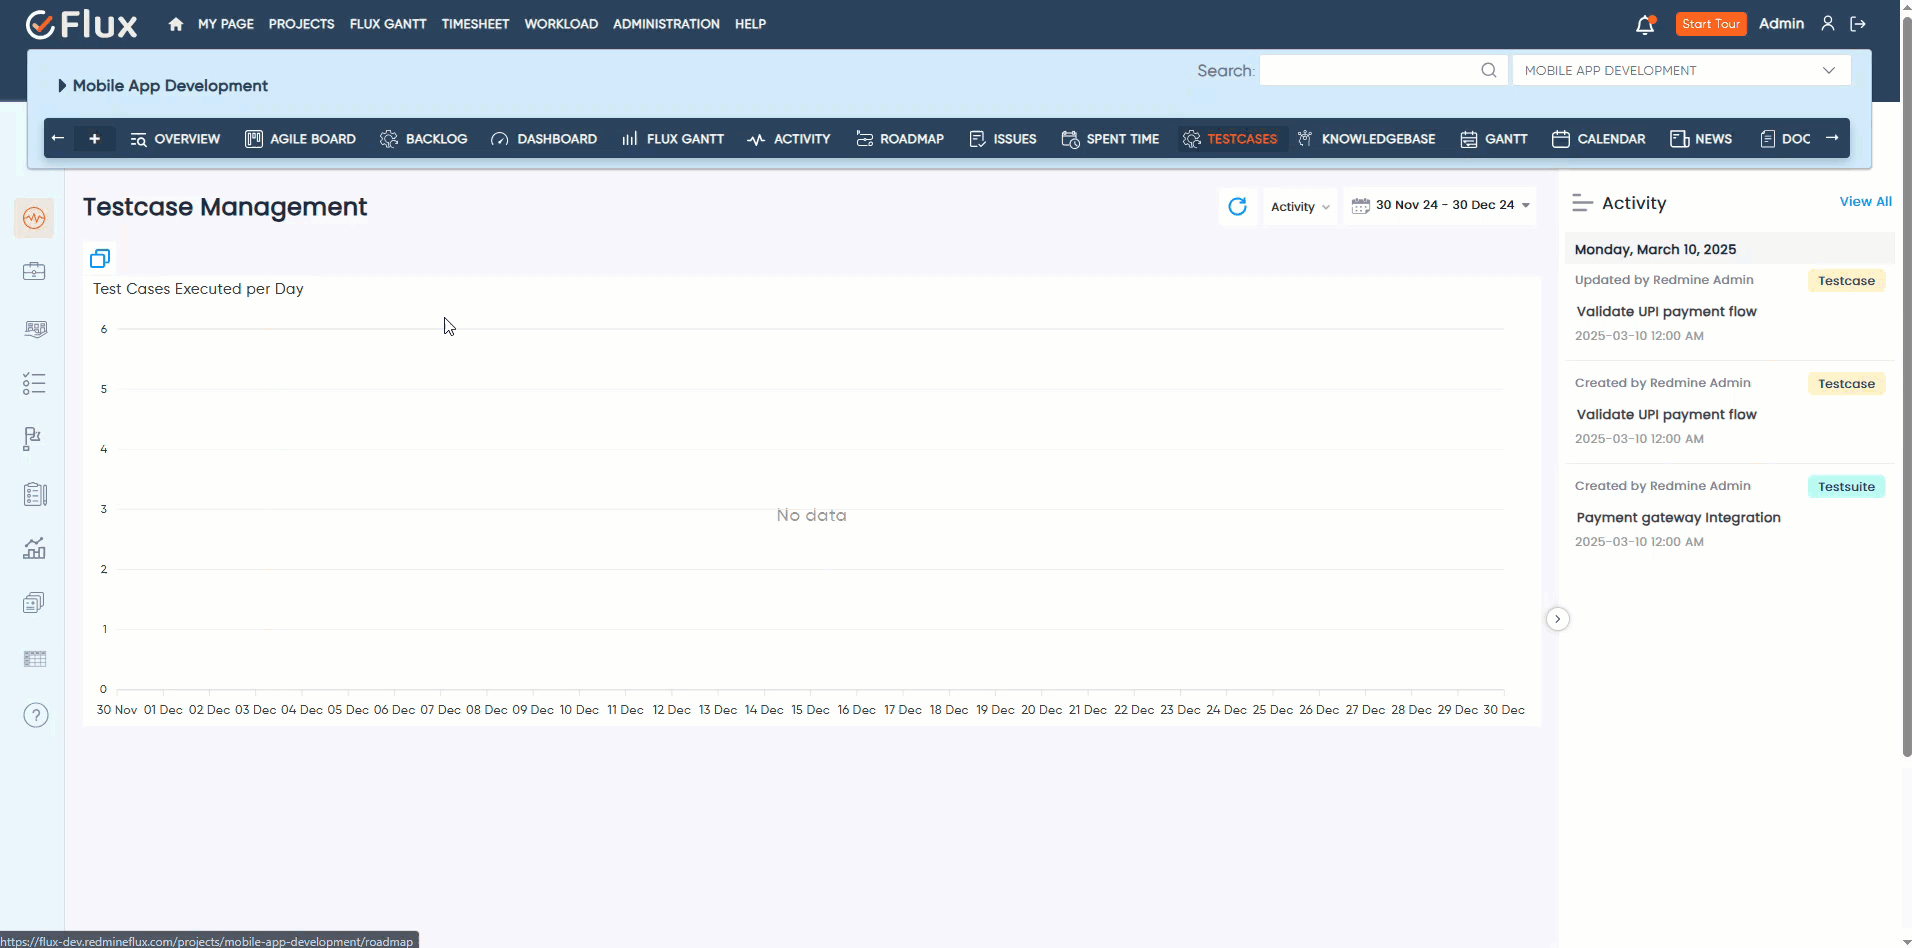
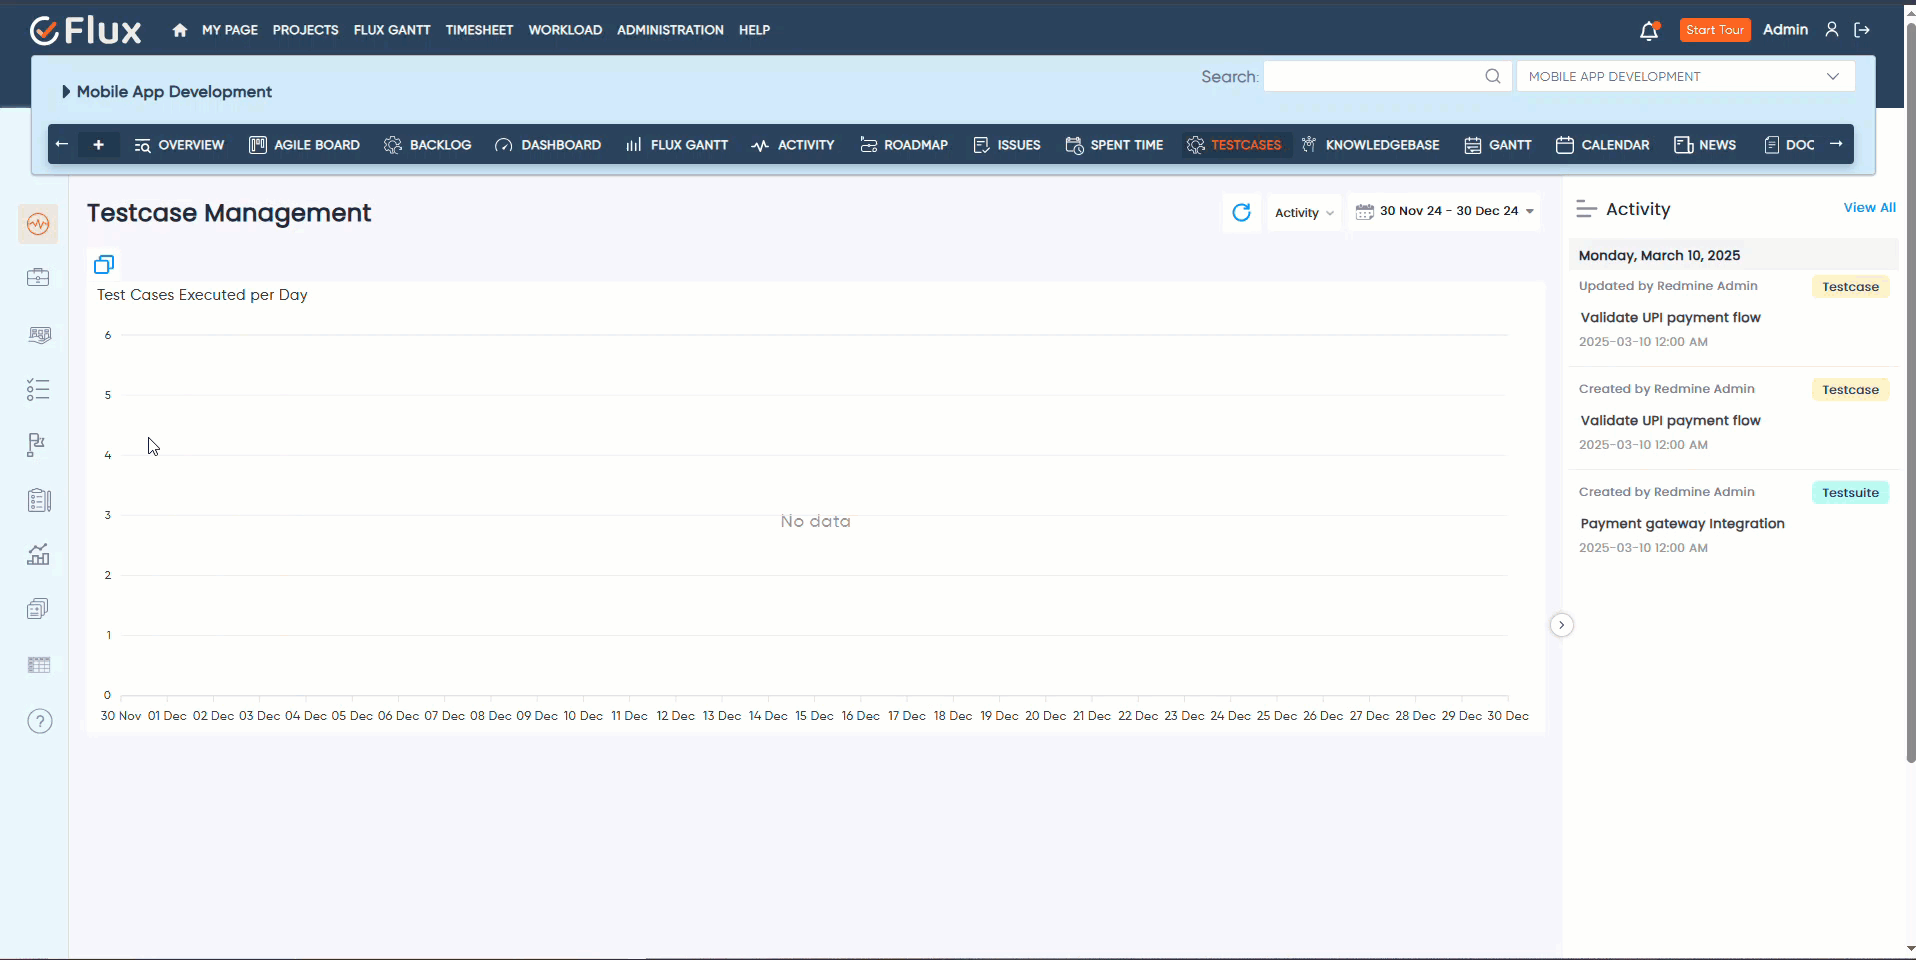
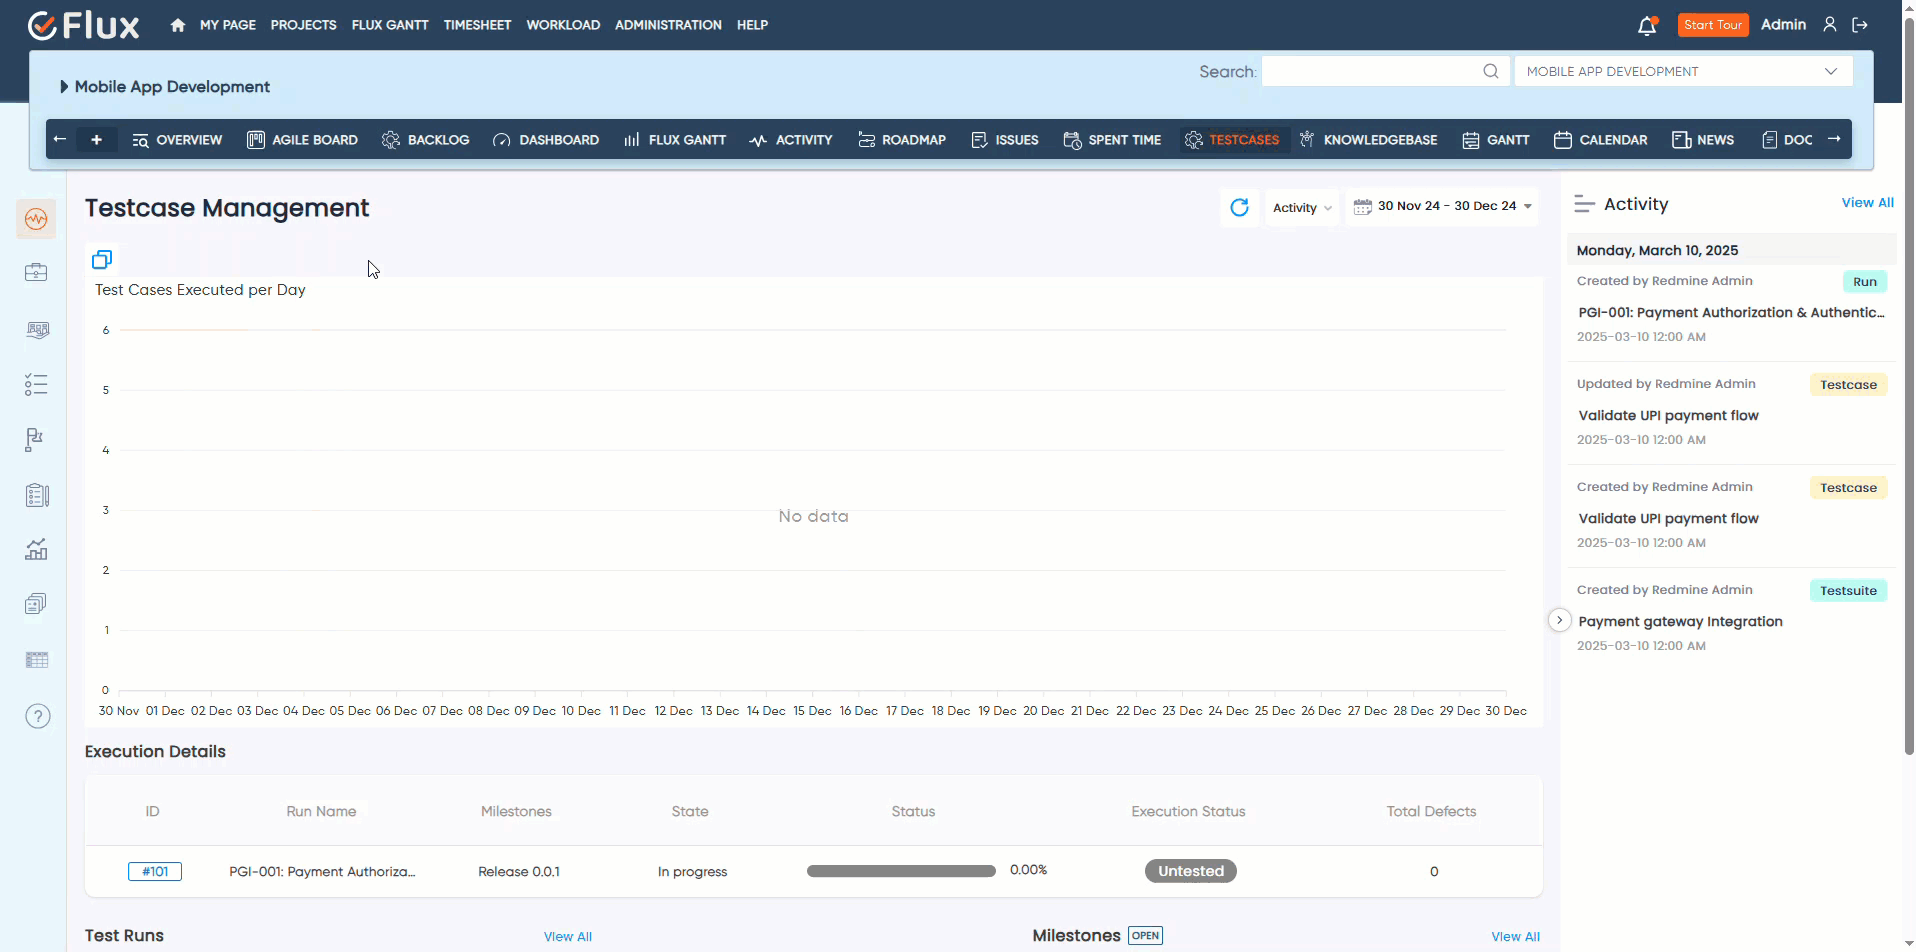
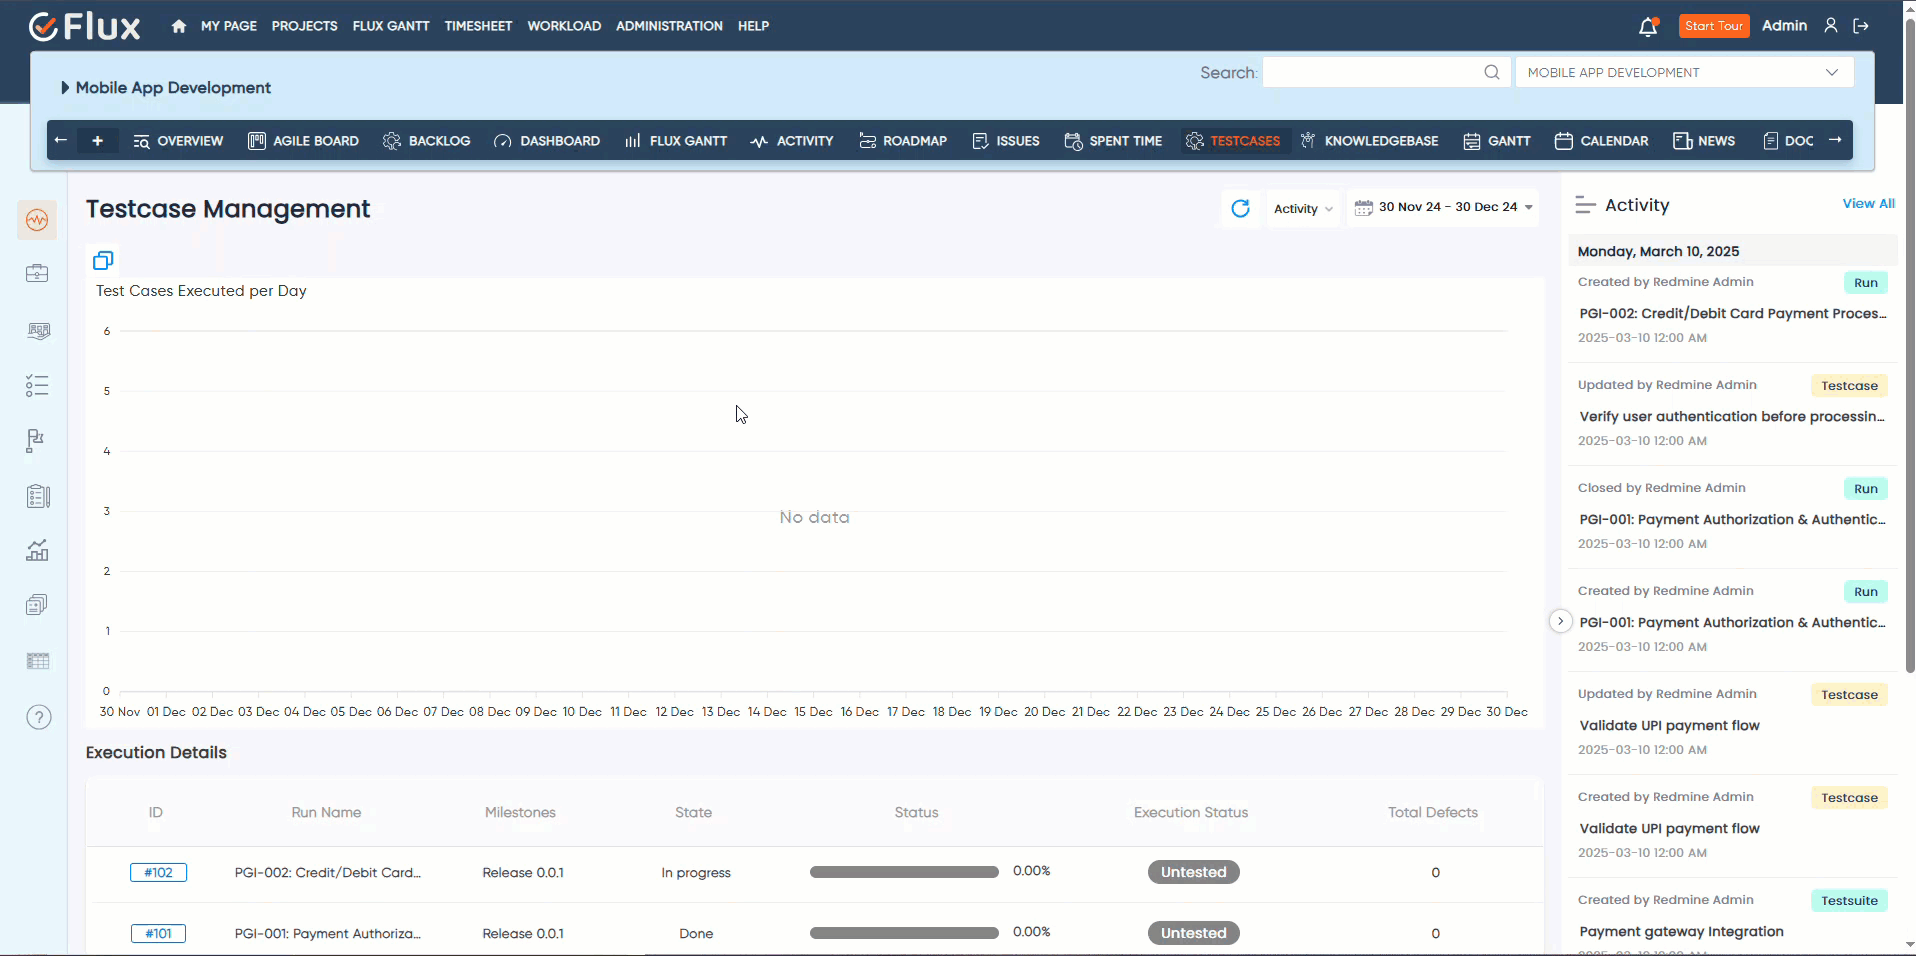
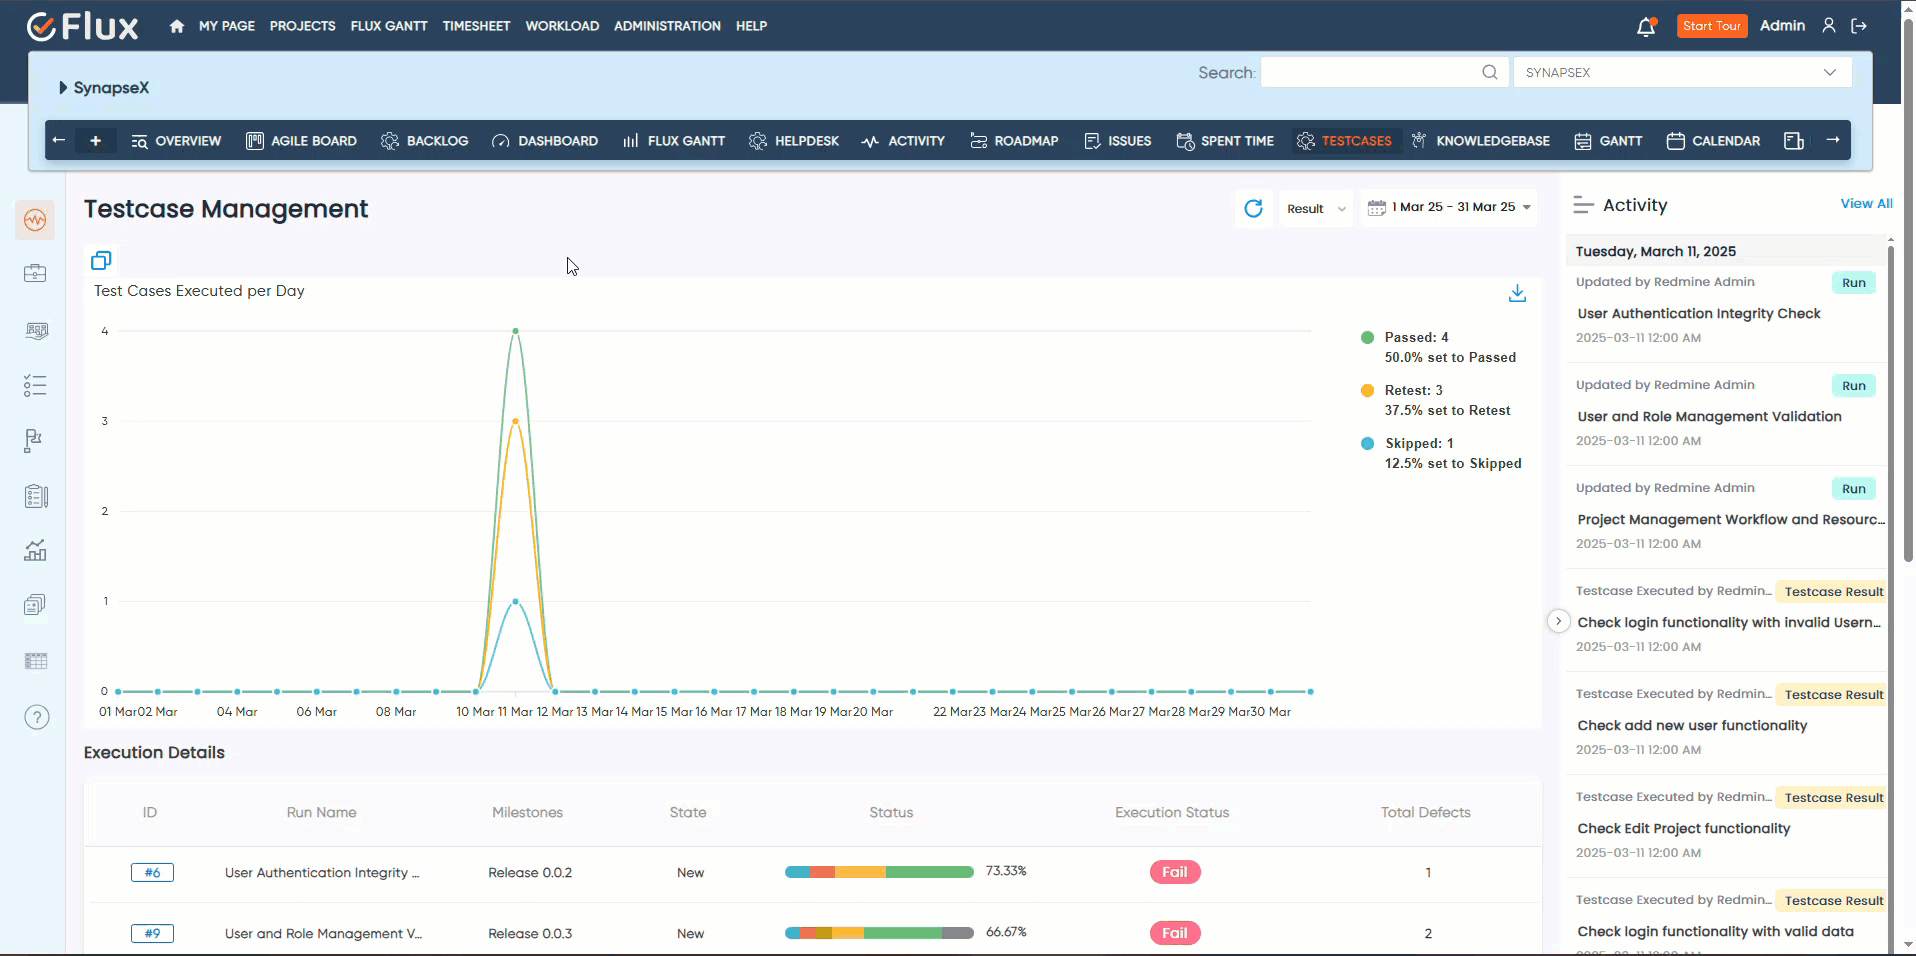
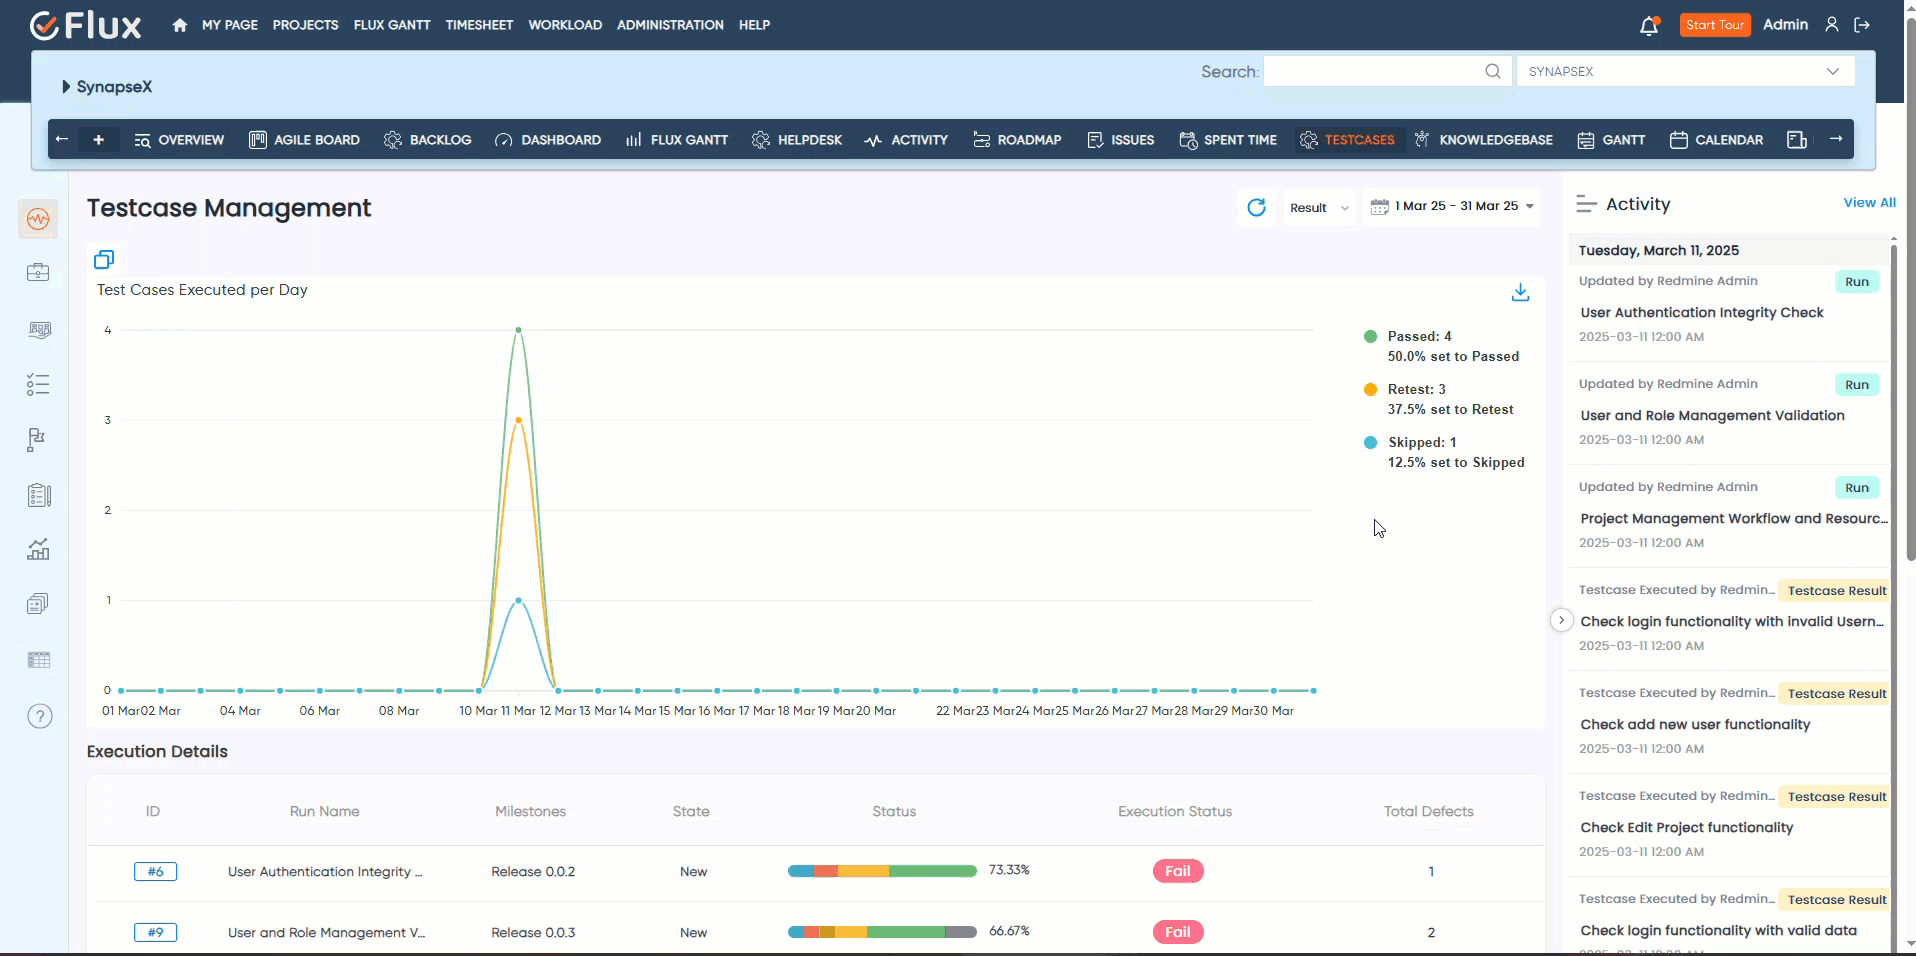
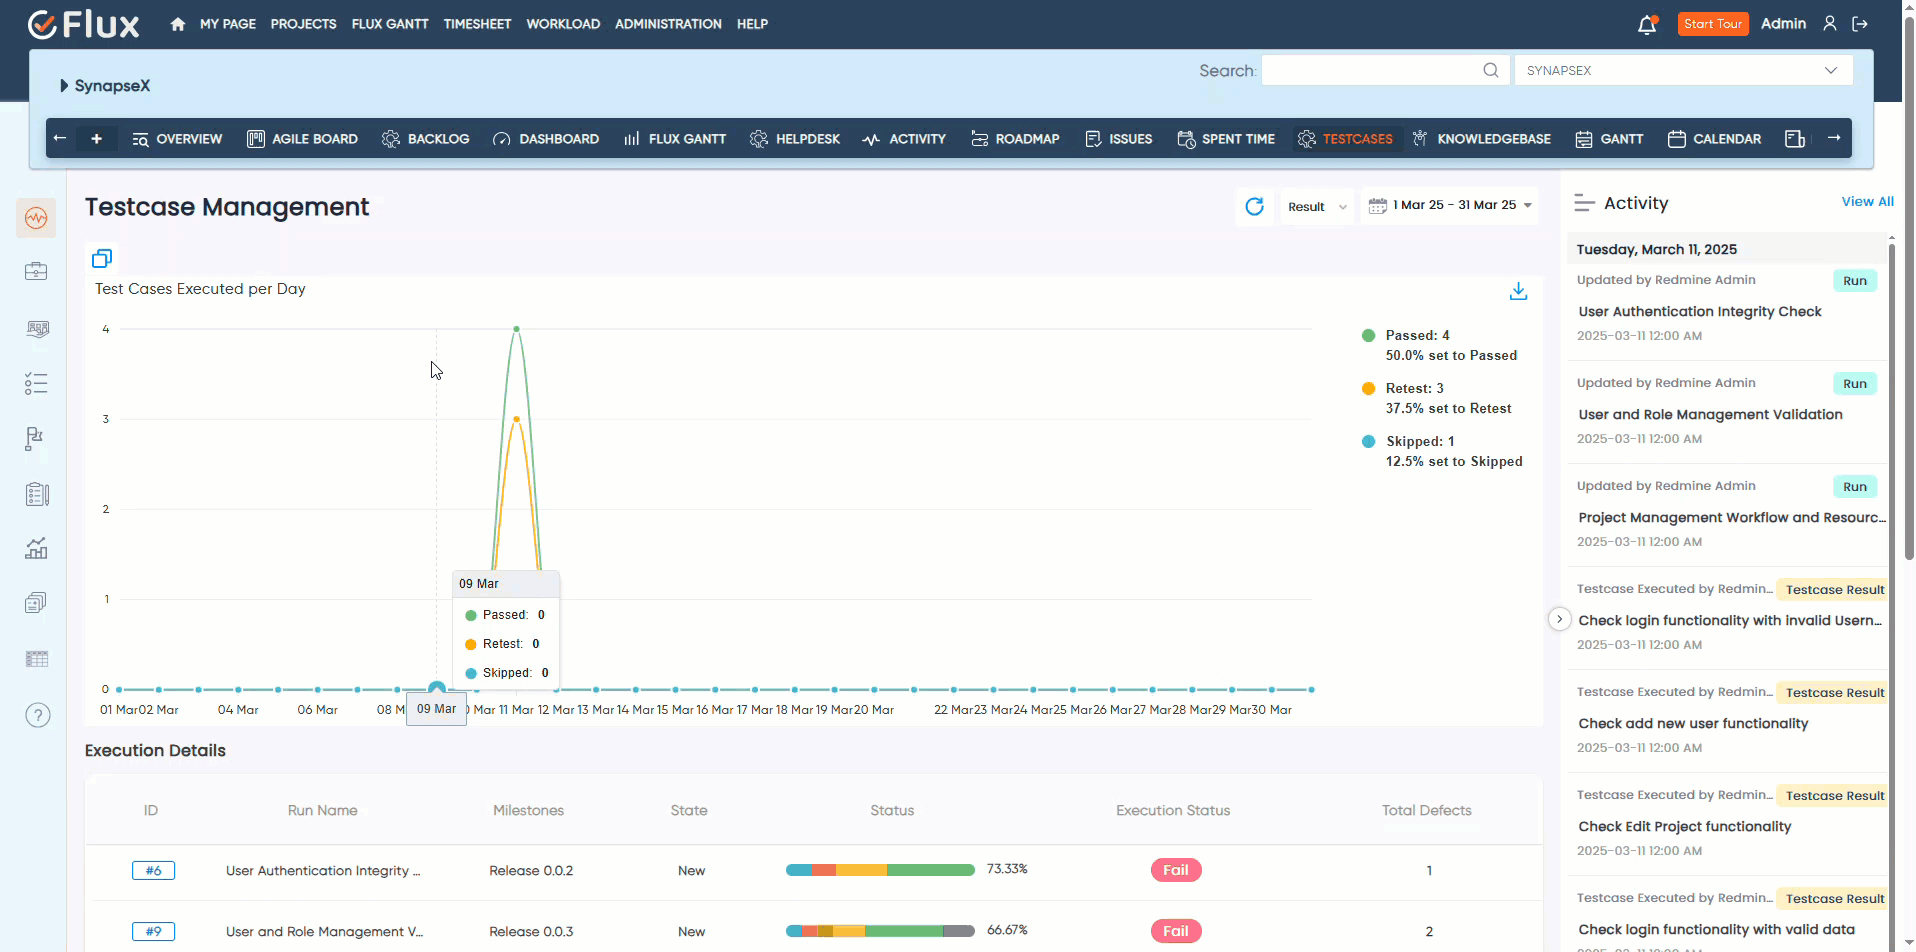
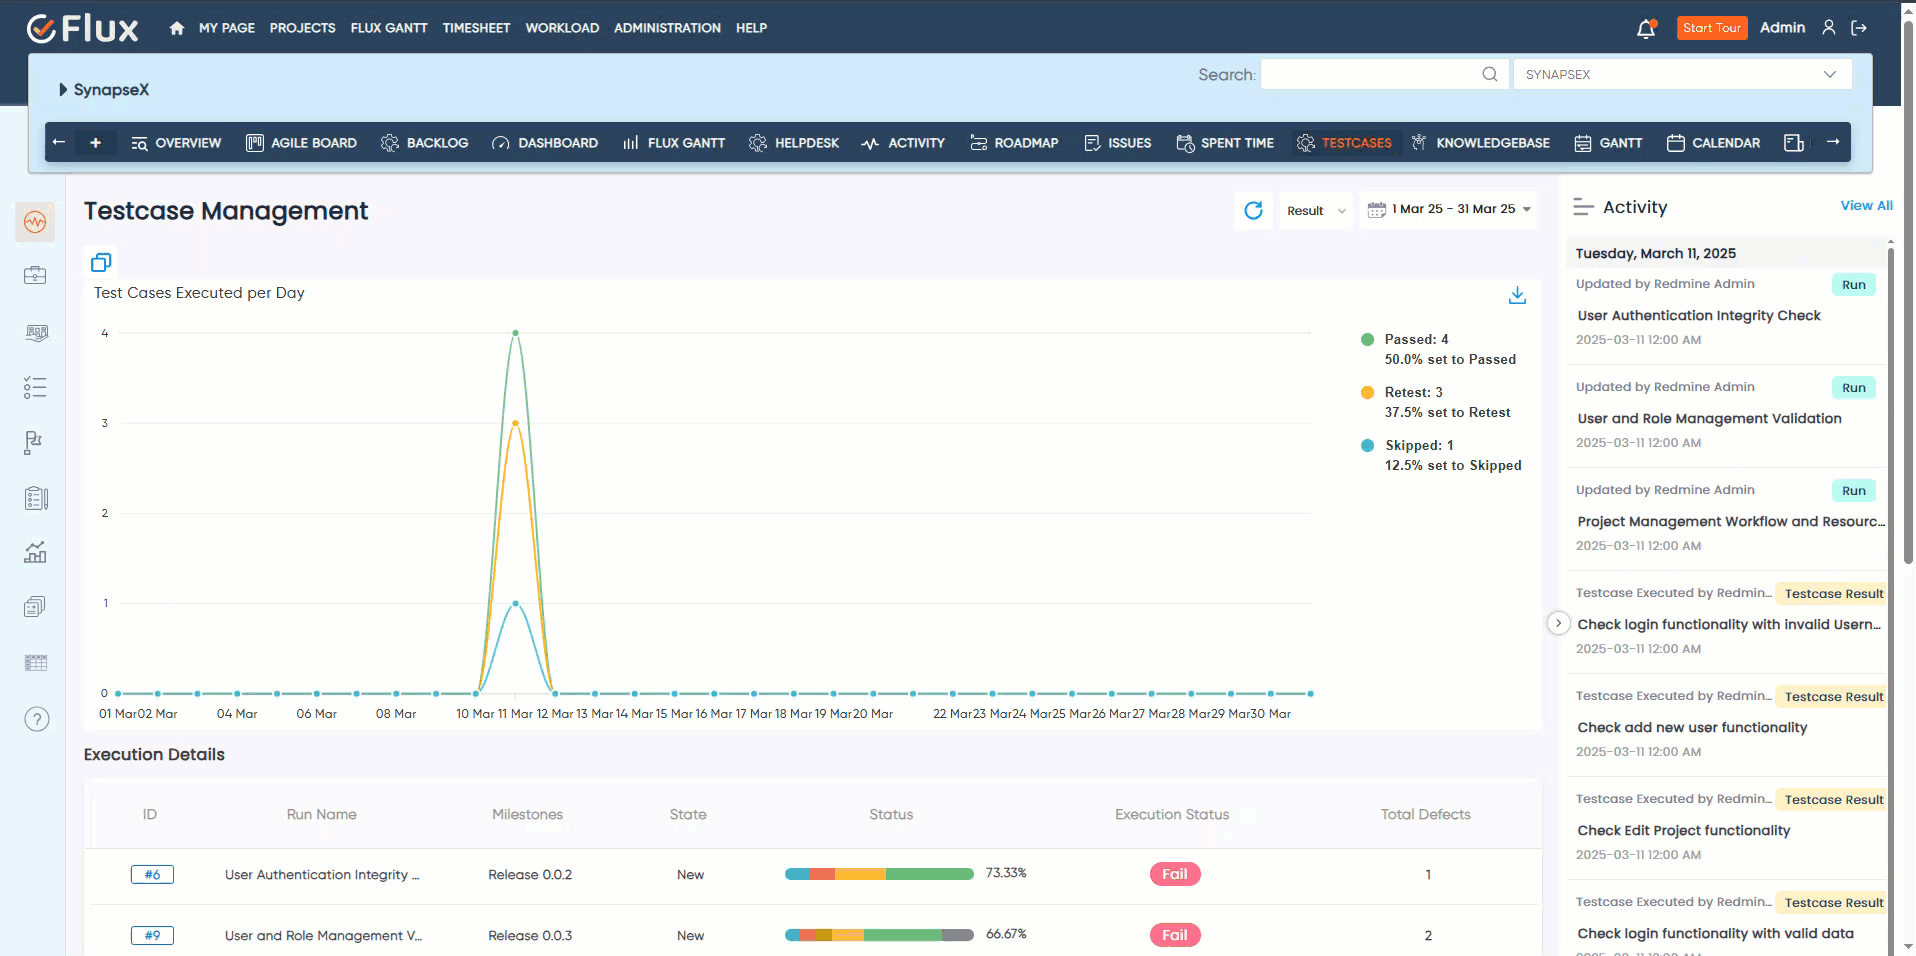
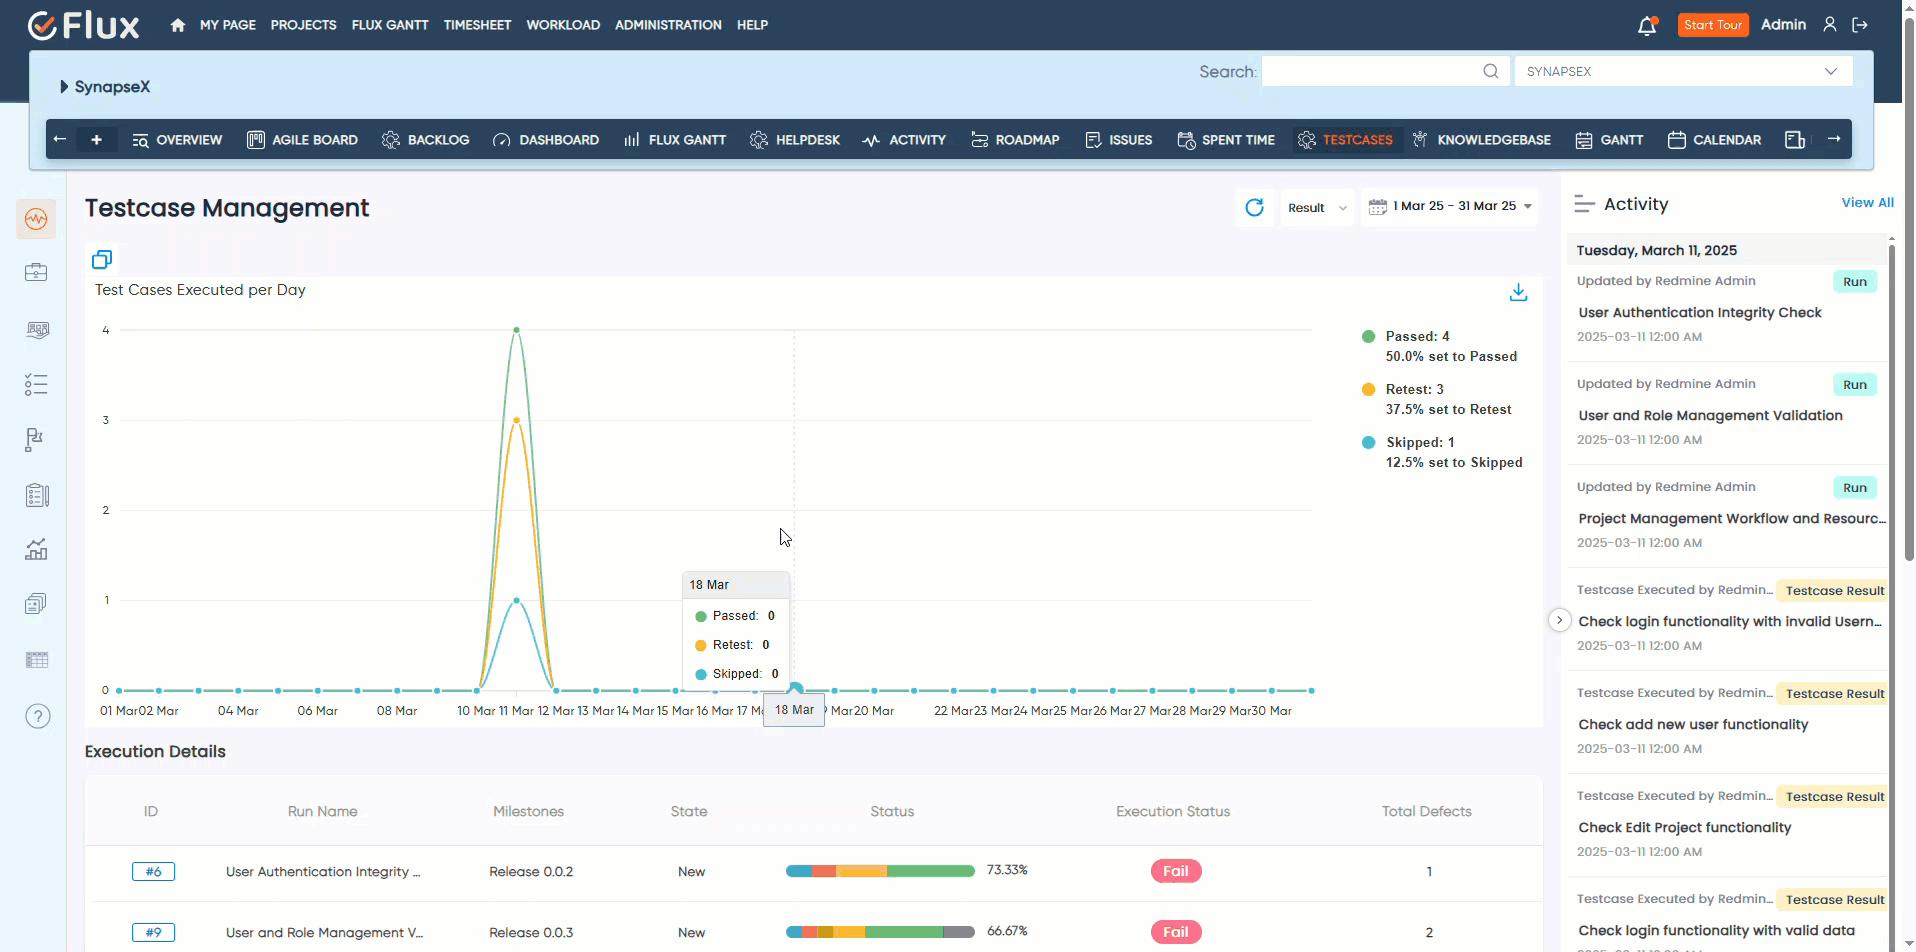
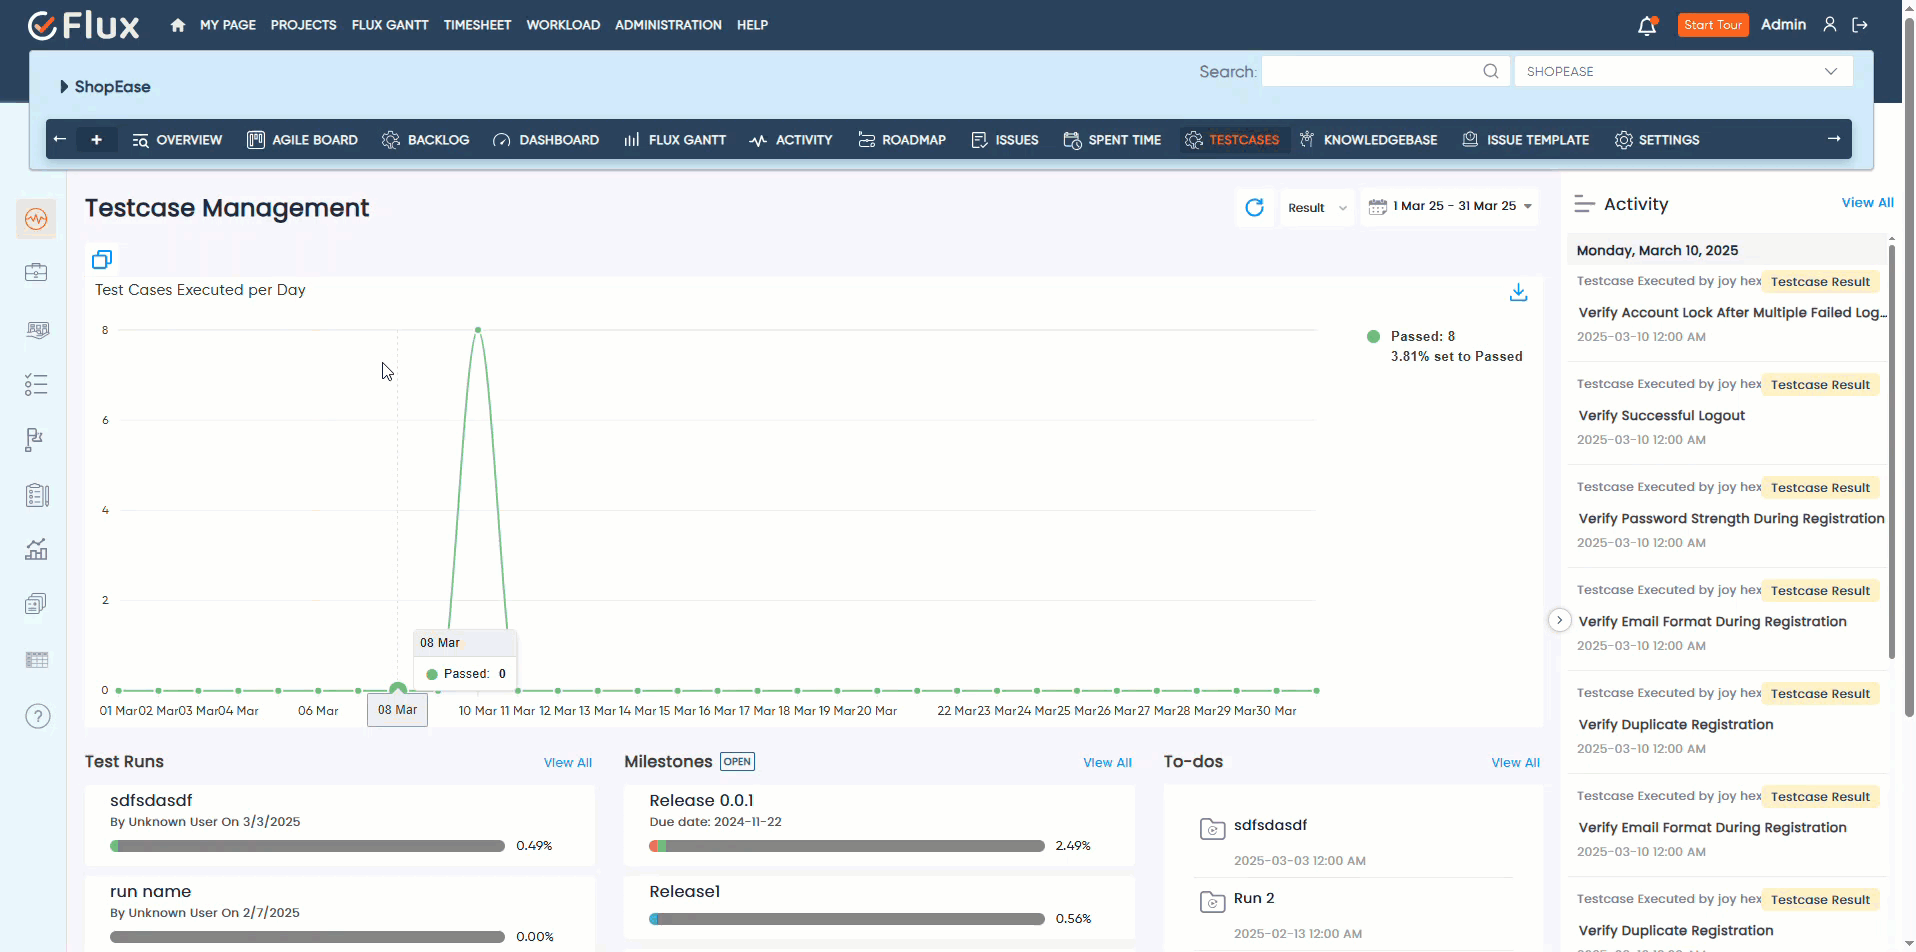
How to View All Executed Test Cases in the Testcase Plugin#
To see all executed test cases in the Testcase Management Plugin, follow these steps:
Access the Testcase Plugin for the desired project.
Navigate to the overview tab from the sidebar.
Here, you will see a graph displaying executed test cases based on the selected date range.
The graph provides insights into test case execution on specific dates, showing how many test cases were Passed, Failed, Retested, Blocked, or Skipped on each day.
There is also a filter option that allows you to refine the execution results based on:
Activity – Filter test cases based on recent execution activities.
Defect – View test cases linked to defects.
Result – Filter by execution status (e.g., Passed, Failed, Skipped).
Apply the desired filters to analyze specific test execution data.
By following these steps, you can efficiently track, filter, and analyze all executed test cases within the Testcase Management Plugin.
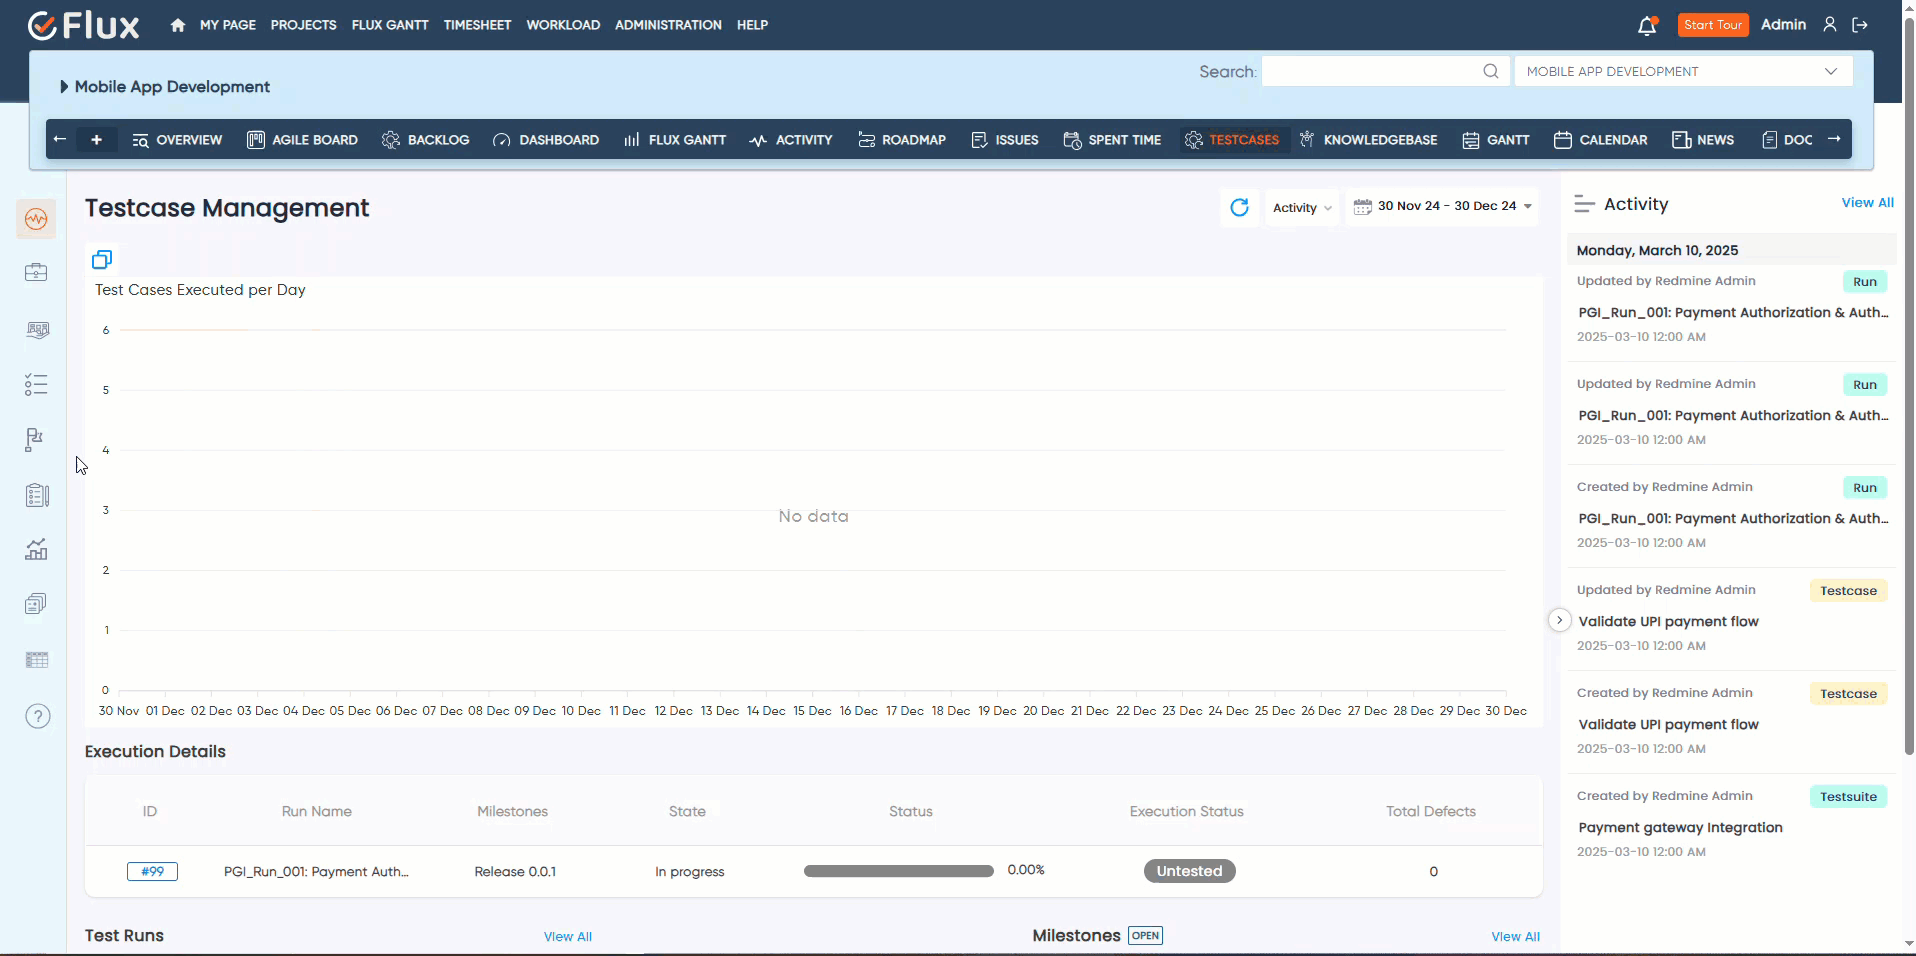
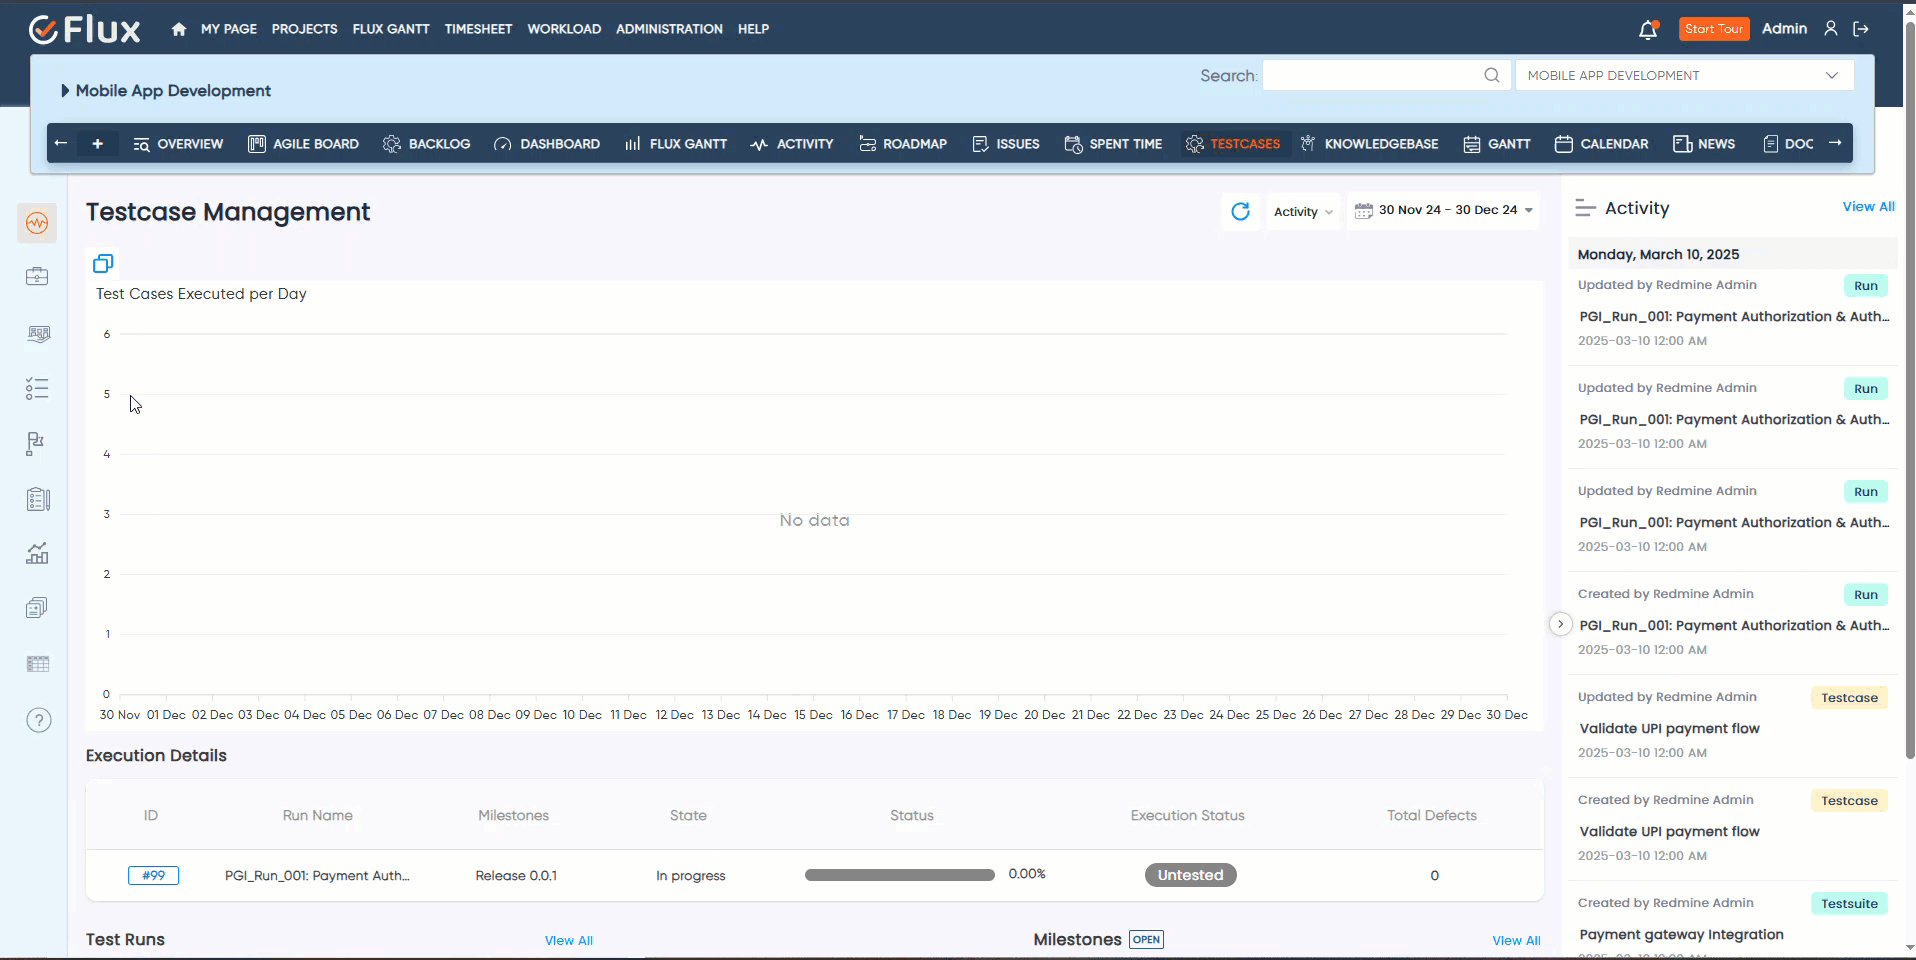
How to View the Latest Executed Runs in the Testcase Plugin#
To review the latest executed runs within the Testcase Management Plugin, follow these steps:
Access the Testcase Plugin for the desired project.
From the left sidebar, click on Overview.
Scroll down to locate the Execution Details tab, which is displayed below the graph.
Here, you will find a list of the latest executed test runs, including their execution status and results
By following these steps, you can easily track and analyze the most recent Test Runs within the Testcase Management Plugin.
To create a Report in the Testcase Management Plugin, follow these steps:
Access the Testcase Plugin for the specific project.
Navigate to the Reports tab from the sidebar.
Click on the New Report button to initiate the report creation process.
A form will appear, prompting you to enter general details such as:
Report Name – Provide a meaningful name for the report.
Description – Enter a brief description of the report.
Run Selection – Choose whether to include all runs or specific selected runs.
Report Scheduling – Choose to generate the report immediately (Right Now) or schedule it for later.
Email Notifications – Enter the email IDs of users who should receive a notification when the report is generated.
Select the Report Format – Based on the chosen report type, additional form fields will appear. The available report types include:
Testcase Summary Report – Displays the current status of test cases (Passed, Failed, Skipped, Retest, Blocked) for the selected test runs.
Defect Summary – Lists defects associated with each test case in the selected runs, providing insights into failure reasons.
Activity Summary – Summarizes test case execution based on the selected date range and test runs, showing recent activities.
Tester Scorecard – Evaluates tester performance by tracking the number of test cases executed by each QA and calculating their efficiency.
Requirement Coverage Report – Calculates the percentage of completed requirements in the selected test runs.
Overdue Run Summary – Displays reports of test runs that are past their due date but remain incomplete.
Click the Create Report button to generate the report.
By following these steps, you can create and customize reports in the Testcase Management Plugin, ensuring detailed insights into test execution, defects, and tester performance.
If you encounter any issues or problems with Redmineflux Testcase Management plugin, you can follow these troubleshooting steps to resolve them:
Clear your browser cache: Sometime, browser cache can interfere with the proper functioning of plugins. Clear your browser cache and try again.
Check plugin compatibility: Ensure that the installed version of Testcase Management Plugin is compatible with your Redmine installation.
Restart Redmine server: Restarting Redmine and server can often resolve temporary issues or conflicts. Restart the Redmine application server, and then try again.
Verify plugin installation: Double check the Testcase Management Plugin to be correctly installed and enabled in your projects.
Disable conflicting Plugins: Conflicts between different plugins can cause issues. Temporarily disable any other plugins that may be conflicting with the Testcase management Plugin and see if the issue persists. If the problem resolves, try enabling the conflicting plugins one by one to identify the specific conflict.
Report the Issue: If you are unable to resolve the issue, consider reporting it to the plugin’s developers or support team. Provide detailed information about the problem, including steps to reproduce it and any error messages encountered.
1. What is the Redmineflux Testcase Management Plugin?
The Redmineflux Testcase Management Plugin is a powerful plugin designed for software development and QA teams to streamline their testing processes. It allows for the creation, organization, execution of test cases and suites, and provides graphical representations of test results for clear insights into test outcomes.
2. How do I enable the Testcase Management Plugin for Redmine in a project?
Log in with administrative credentials, navigate to the Administrator tab, click on plugins, find the Testcase Management plugin, and configure it as needed. Then, go to the project settings, enable the Testcase management module, and save the changes.
3. Can I add subfolders to test suites?
Yes, you can add subfolders to organize your test suites better. This is done through the Test Cases tab by selecting the “Add sub-folder” option in the Test suite sidebar.
4. What should I do if I encounter issues with the plugin?
If you encounter issues, try clearing your browser cache, ensuring plugin compatibility, restarting the Redmine server, verifying the plugin installation, disabling conflicting plugins, and, if necessary, reporting the issue to the plugin’s developers or support team.
5. Can I log time for individual test cases?
Yes, you can log time for individual test cases from the Testcase detail view page by using the “Log time” option, providing date, time, activity,run, environment, and optionally a comment, then saving the entry.
6. What Redmine versions are compatible with the Testcase Management Plugin?
The plugin is compatible with Redmine versions 5.0.x, and upcoming 6.0.x.
To uninstall the Redmineflux Testcase Management Plugin, follow these steps:
Go to Testcase management plugins directory in Redmine.
Delete the entire Testcase management plugin directory from Redmine/plugins directory. This step removes the plugin files from your Redmine installation.
If the plugin required a migration, run the following command to downgrade your database (make a db backup before): Bundle exec rake redmine:plugins:migrate Name=plugin name VERSION=0 RAILS_ENV=production
Restart the Redmine server to see the changes.
This will uninstall the Redmineflux Testcase Management Plugin from Redmine.
In summary, the Redmineflux Testcase Management Plugin significantly optimizes software testing by facilitating easy creation, organization, and execution of test cases and suites. Its graphical results presentation feature enhances the efficiency and clarity of the testing process, making it an indispensable tool for improving software quality within development and QA teams.